
Guide
1
Create a new customization
Create a new customization.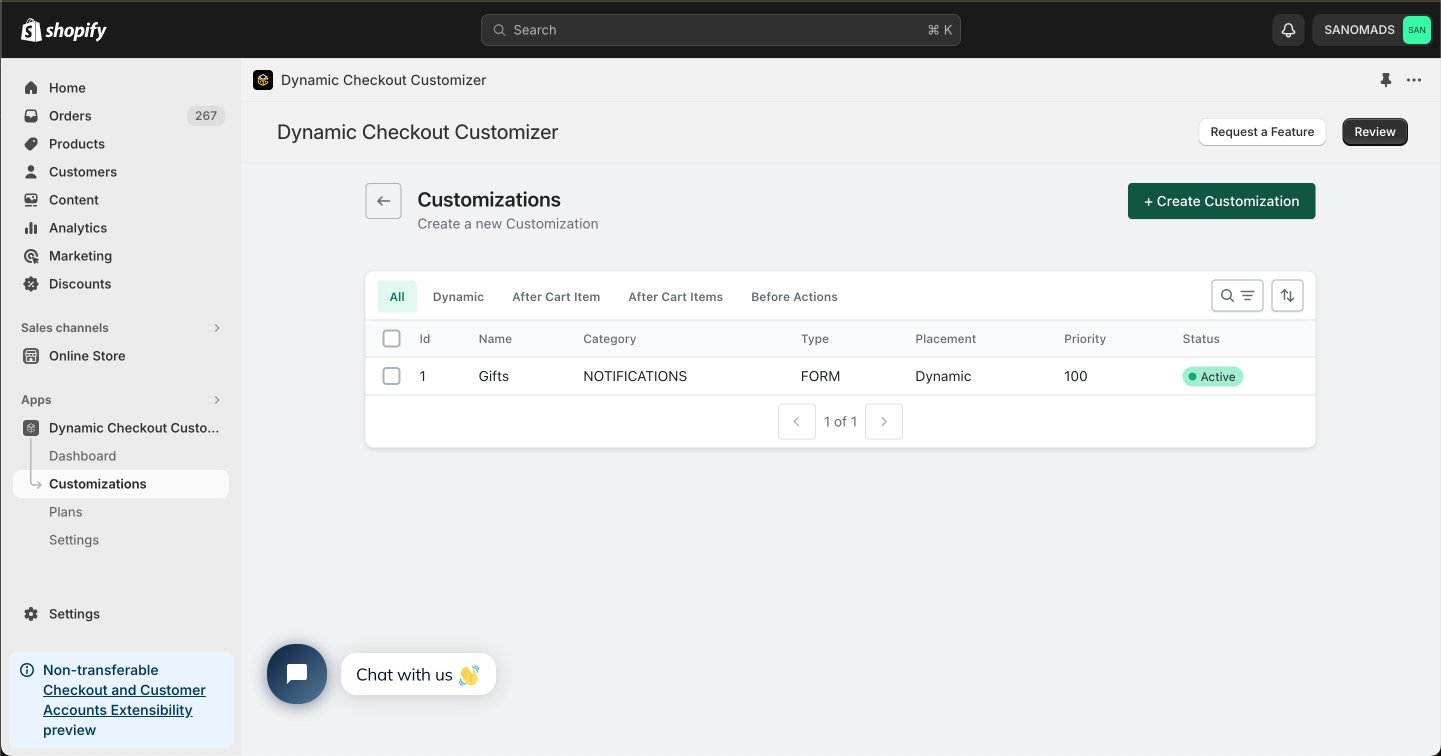
2
Select the Notifications category
Choose Notifications as the customization category.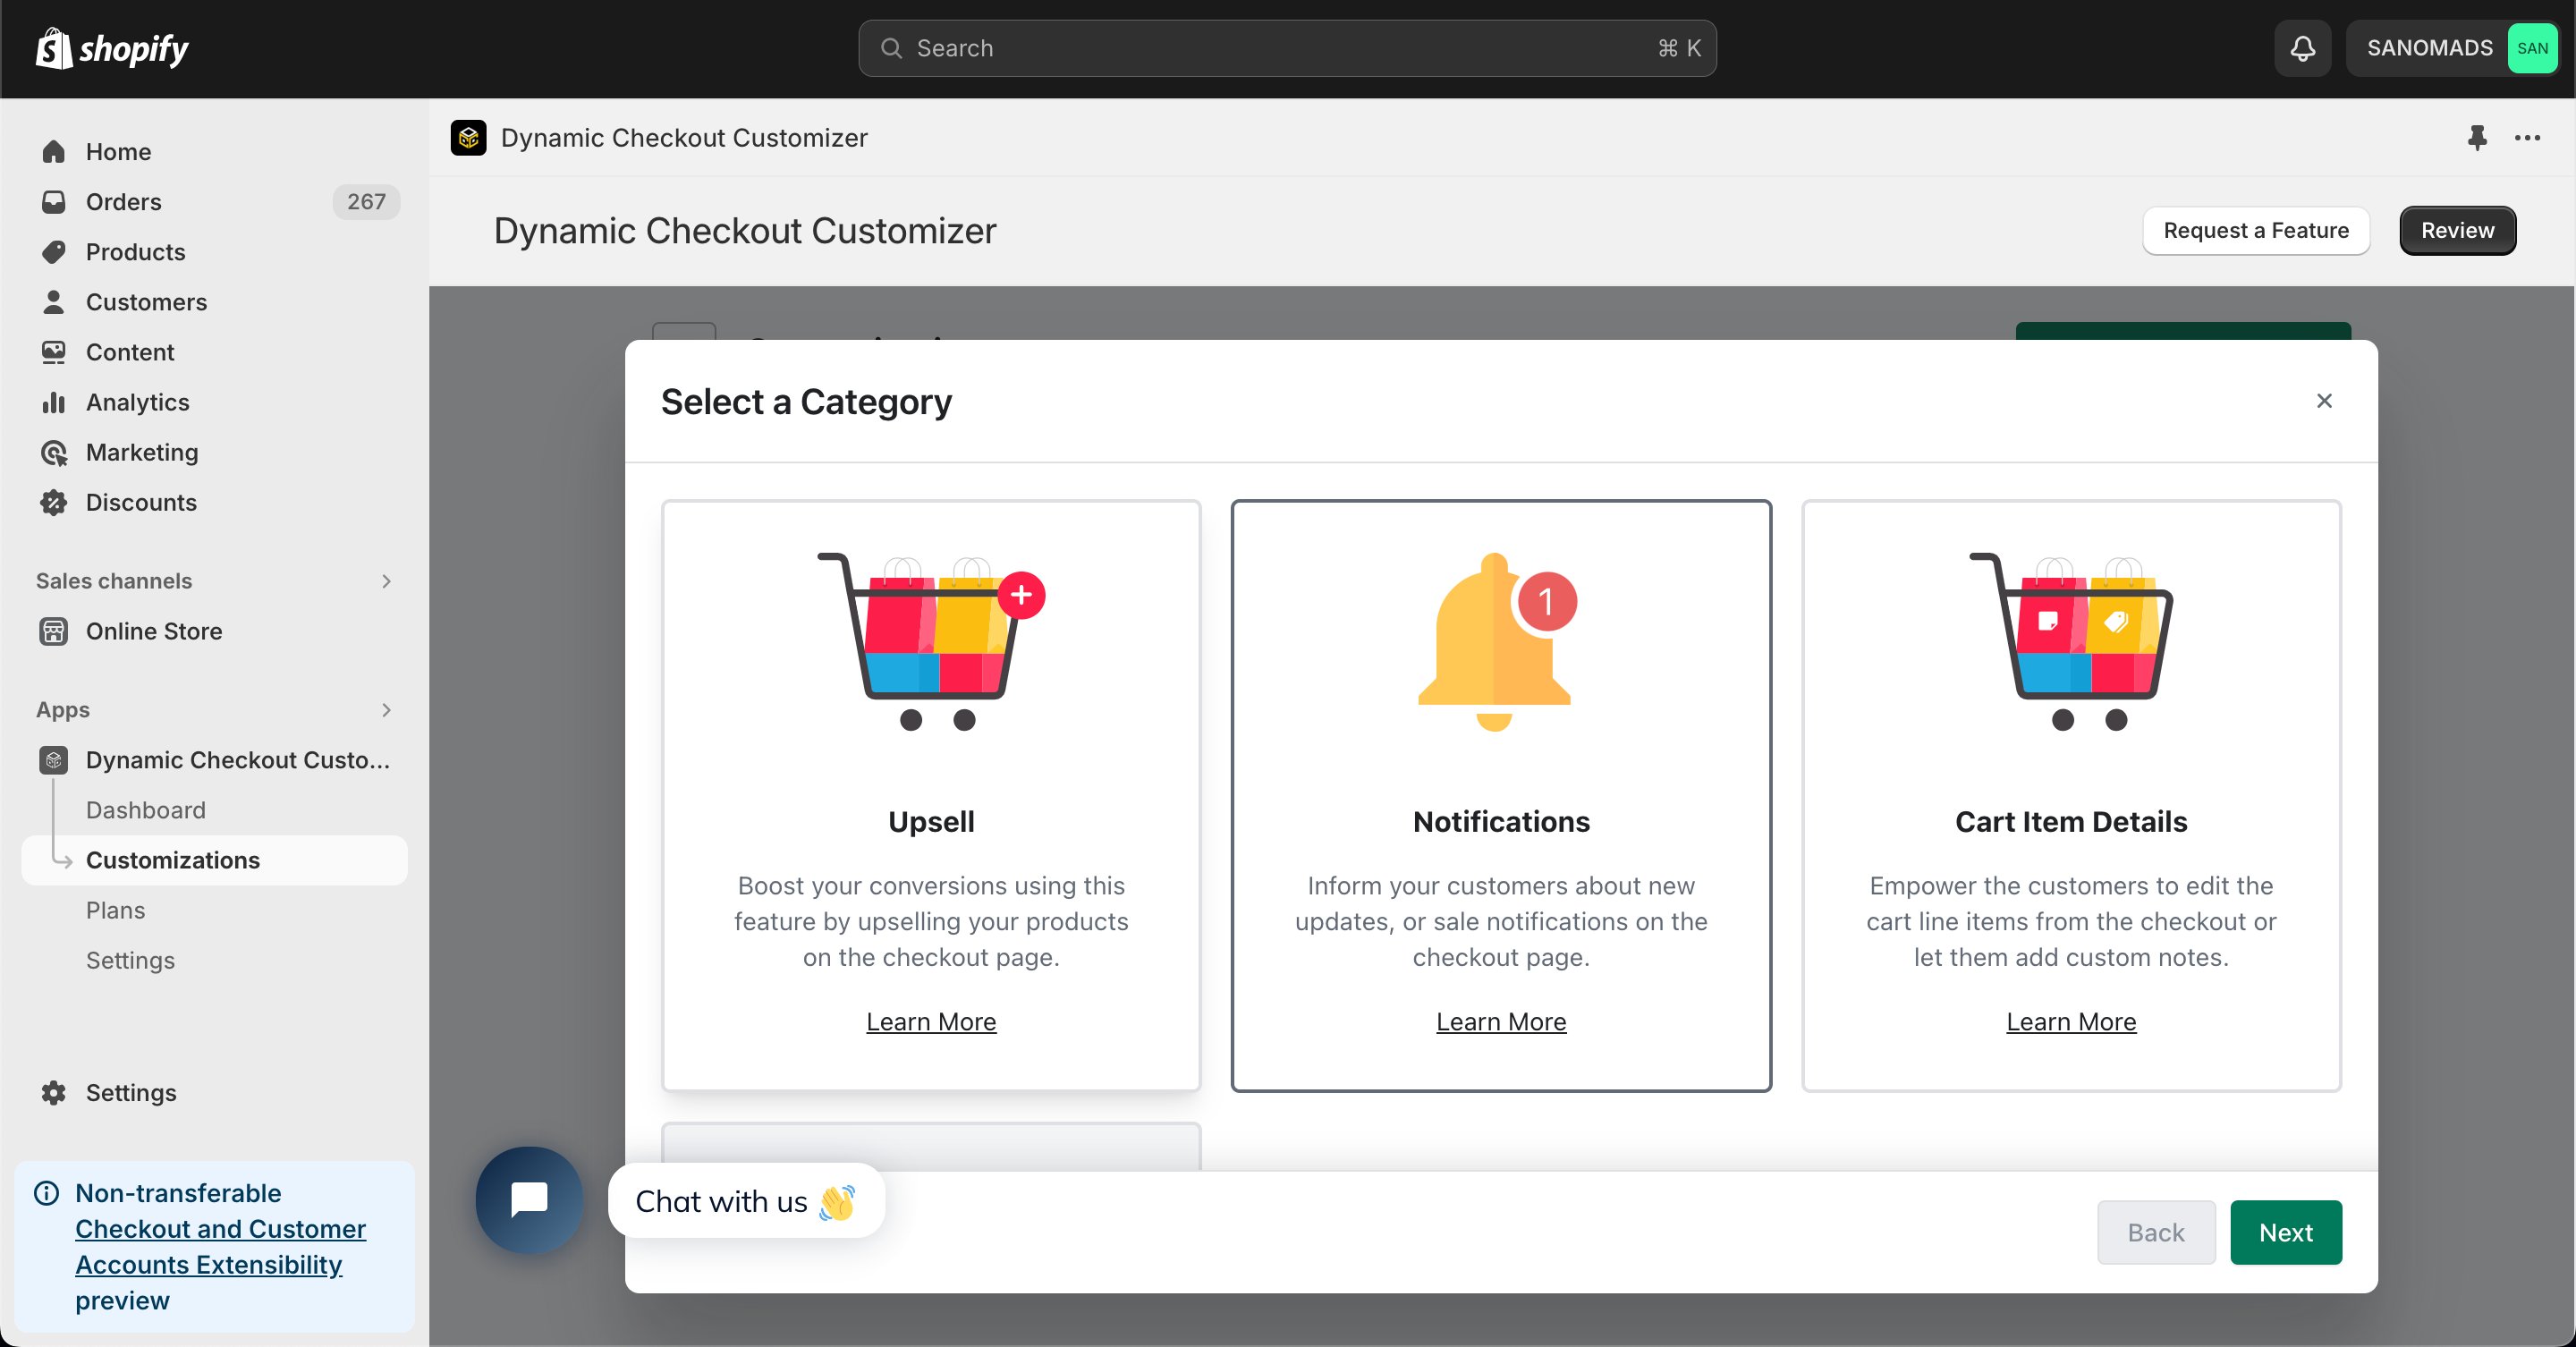
3
Choose the Content type
Select Content from the available notification types to display custom text or images during checkout.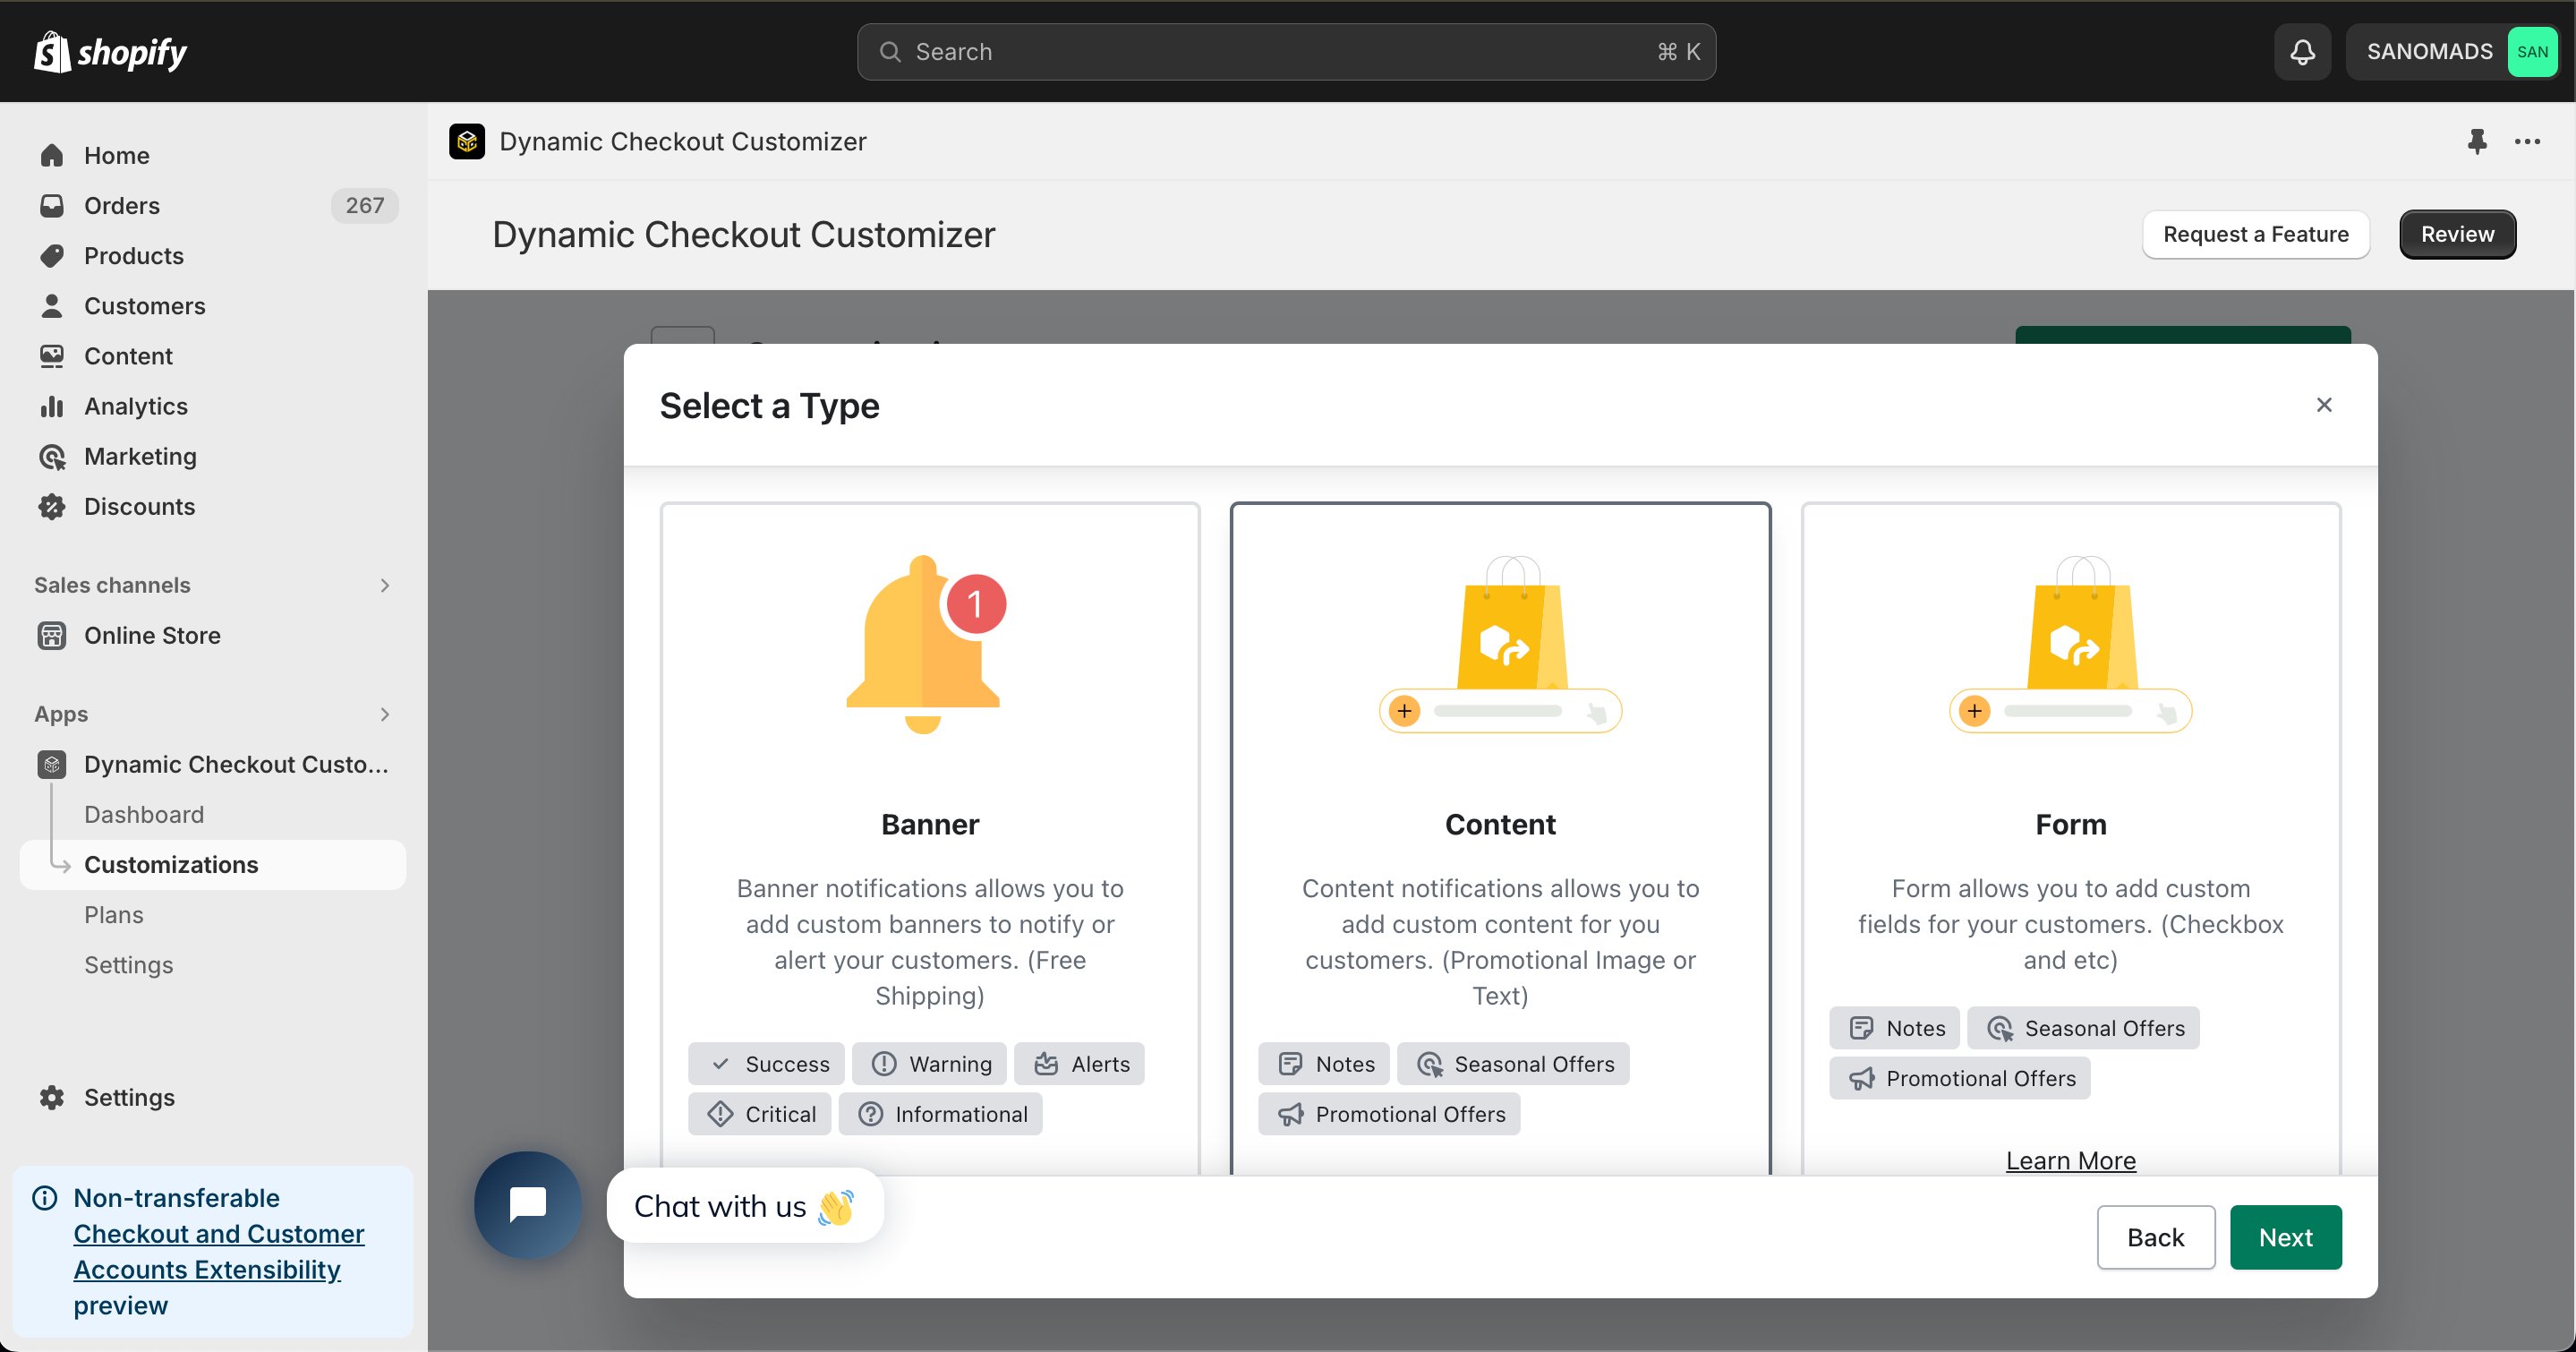
4
Choose a placement
Select Dynamic Render from the available placement options.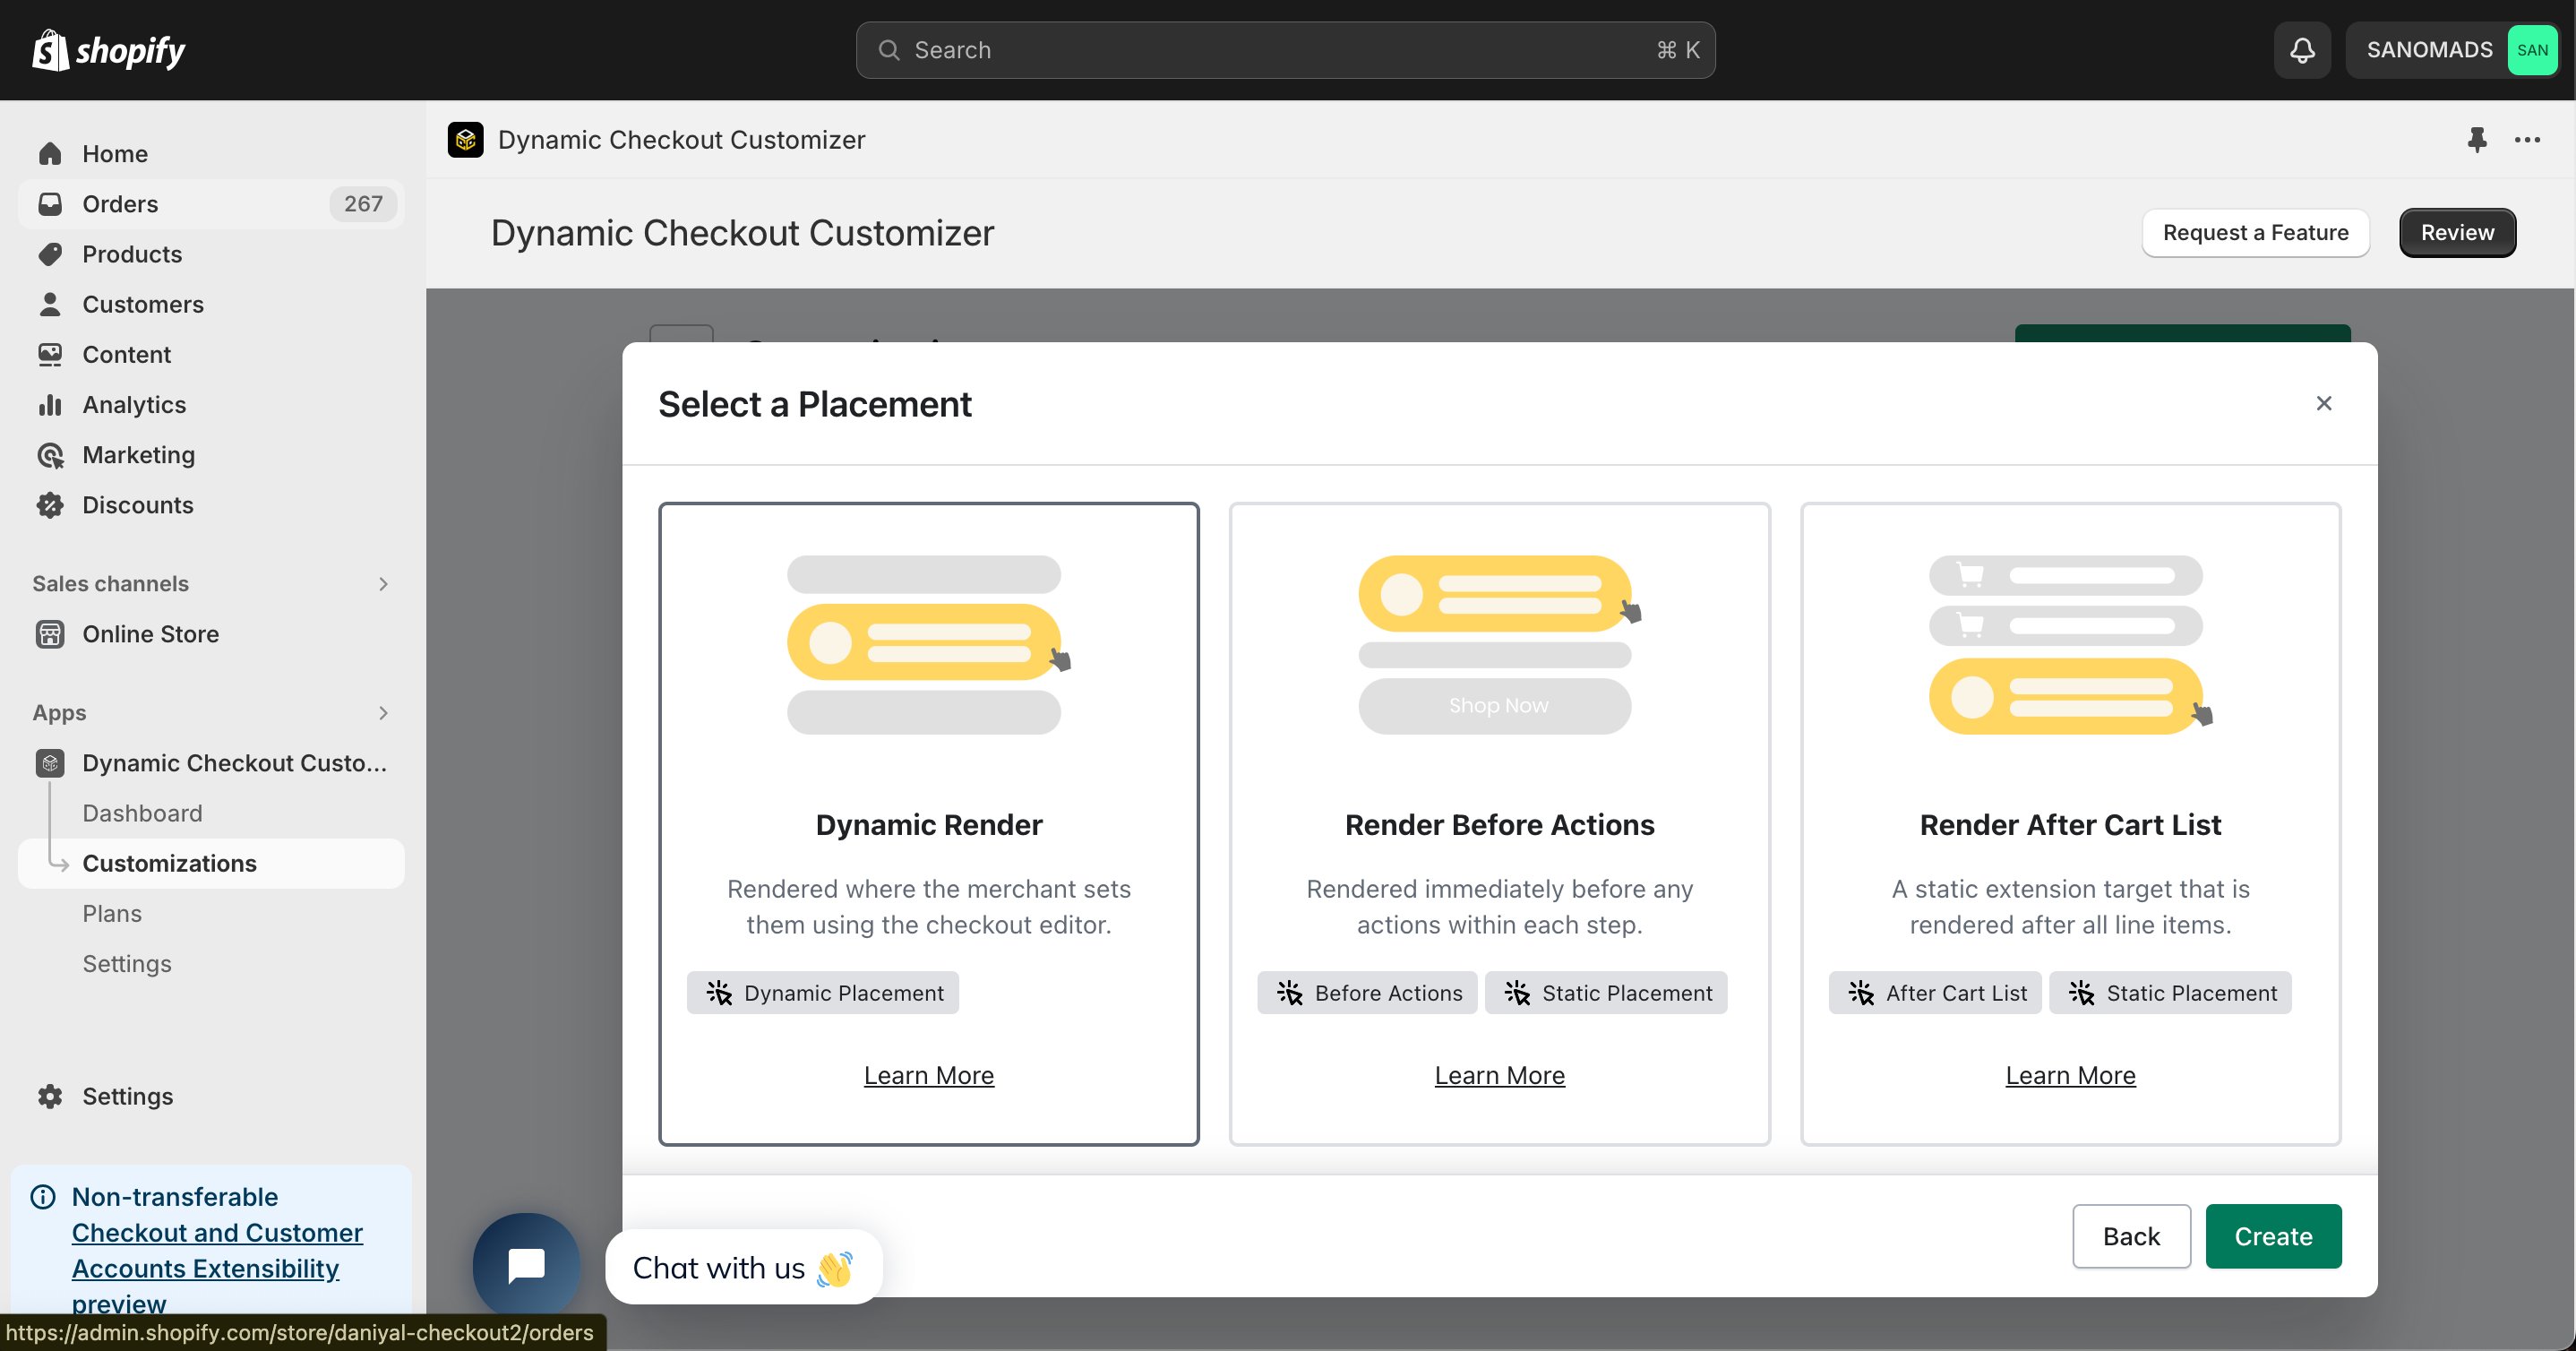
5
Configure display conditions
Add one or more conditions to control when the content appears during checkout.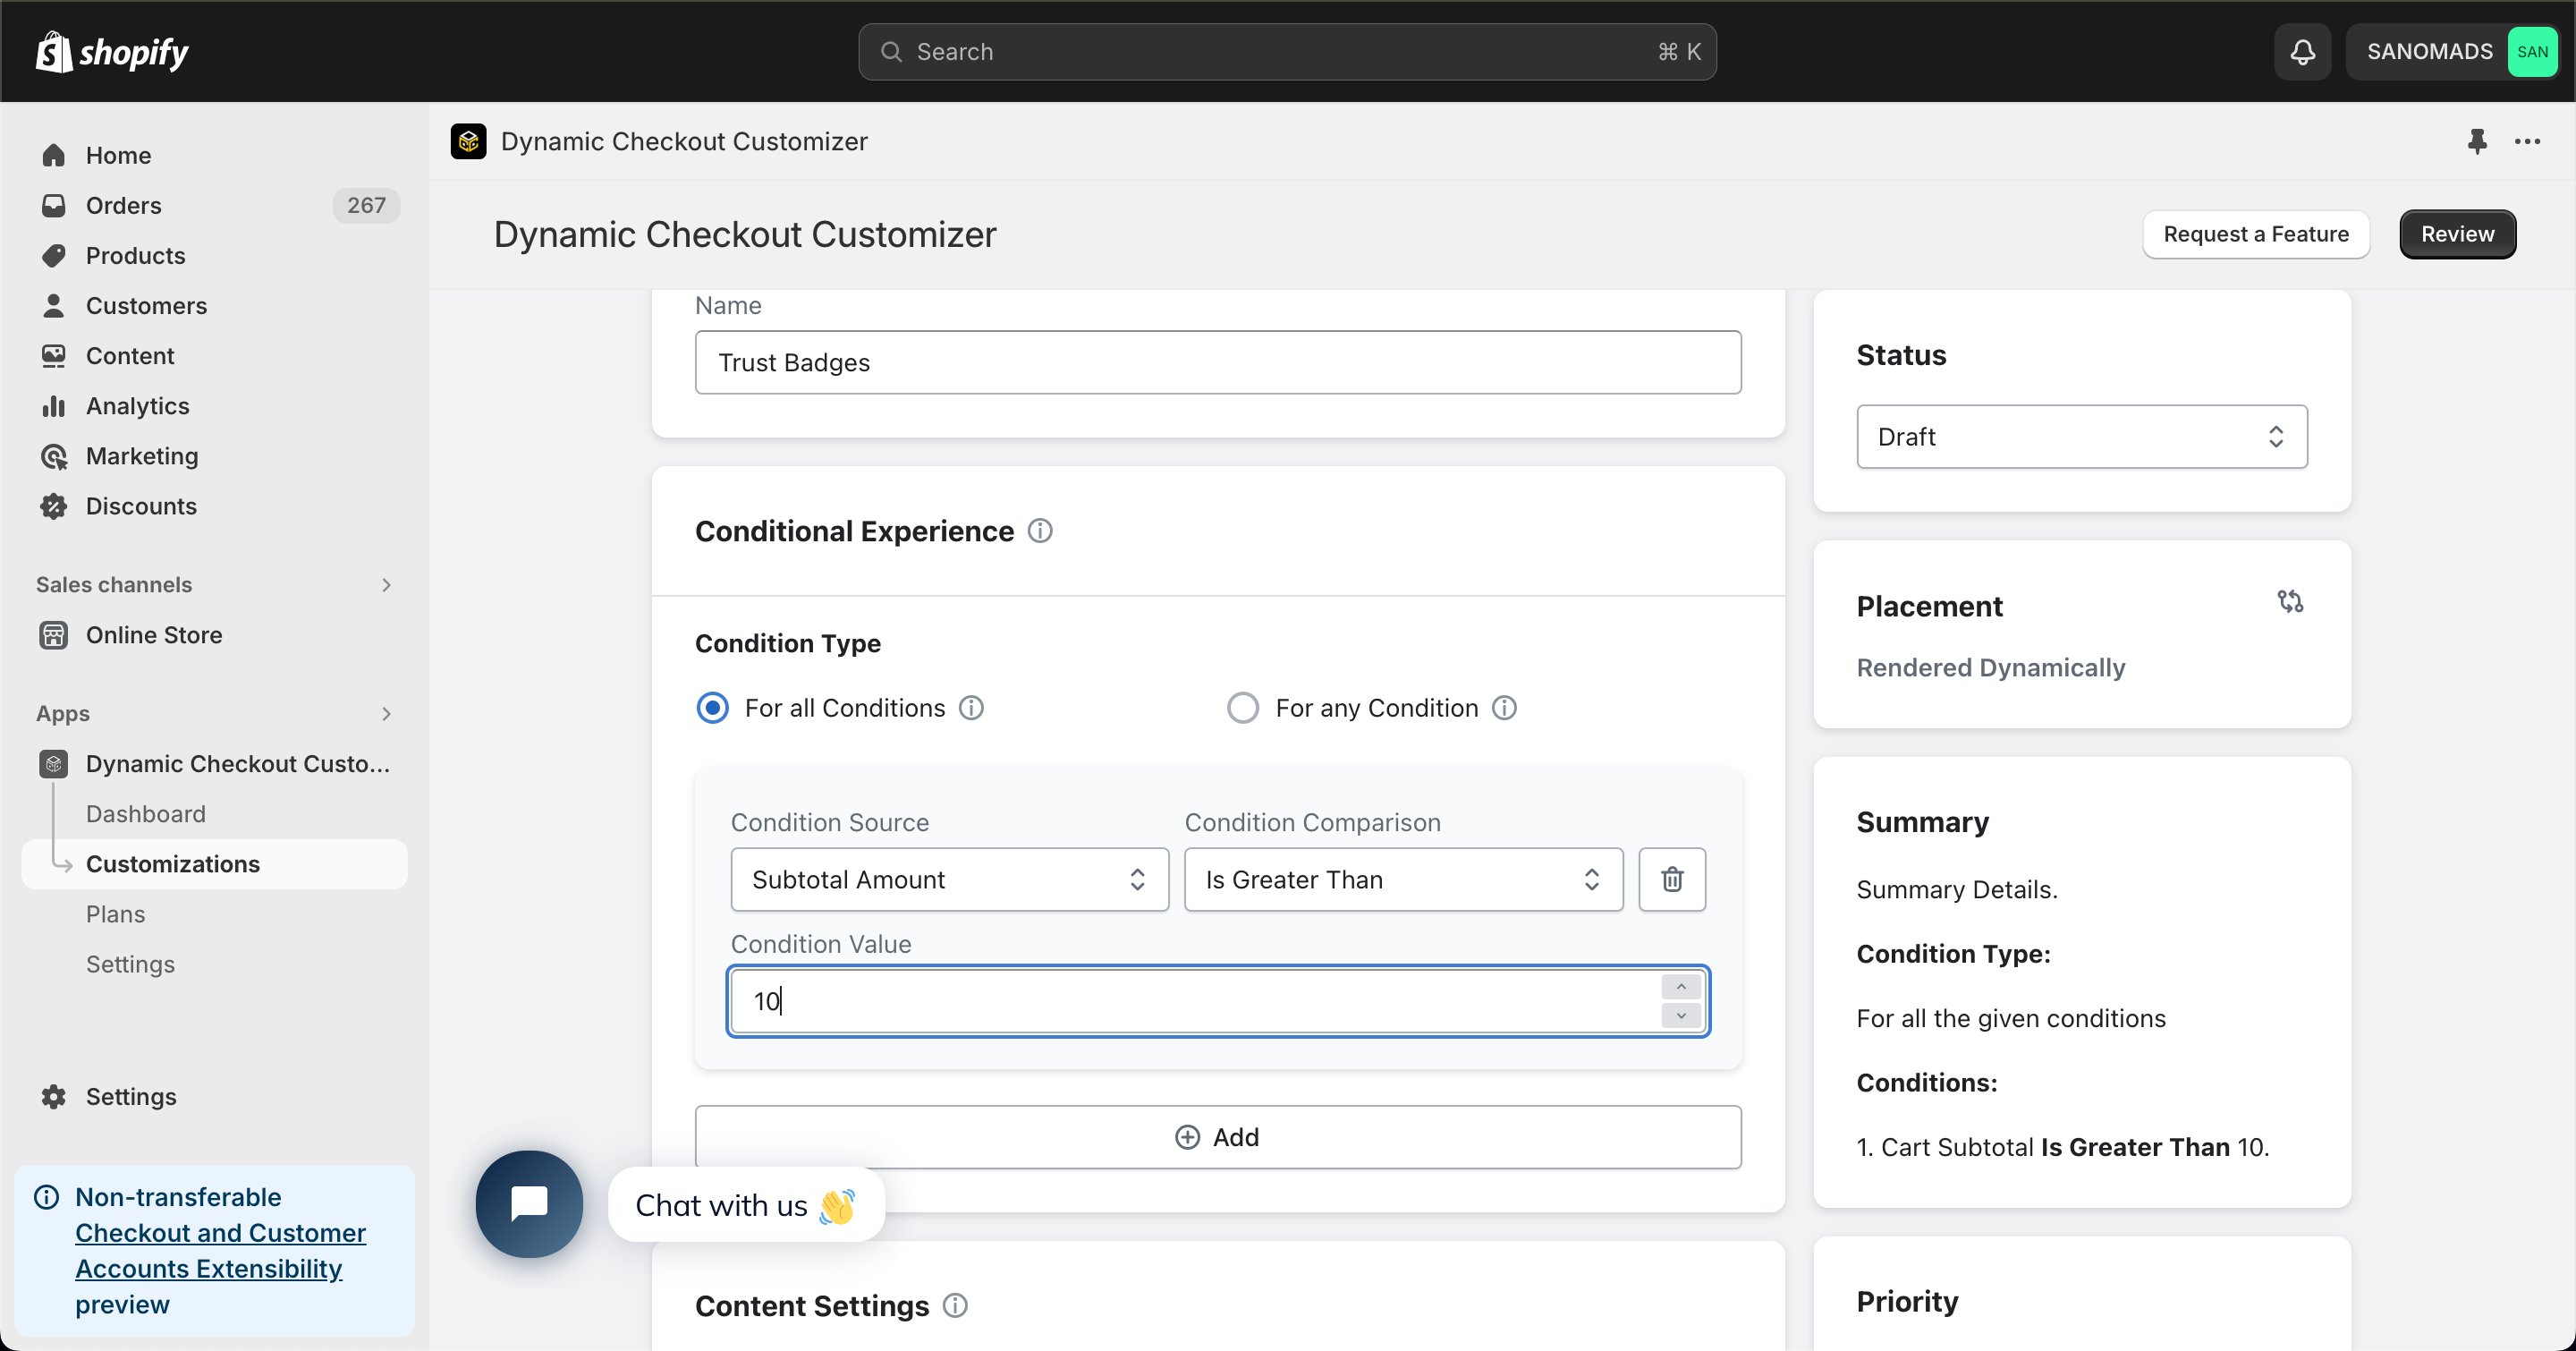
6
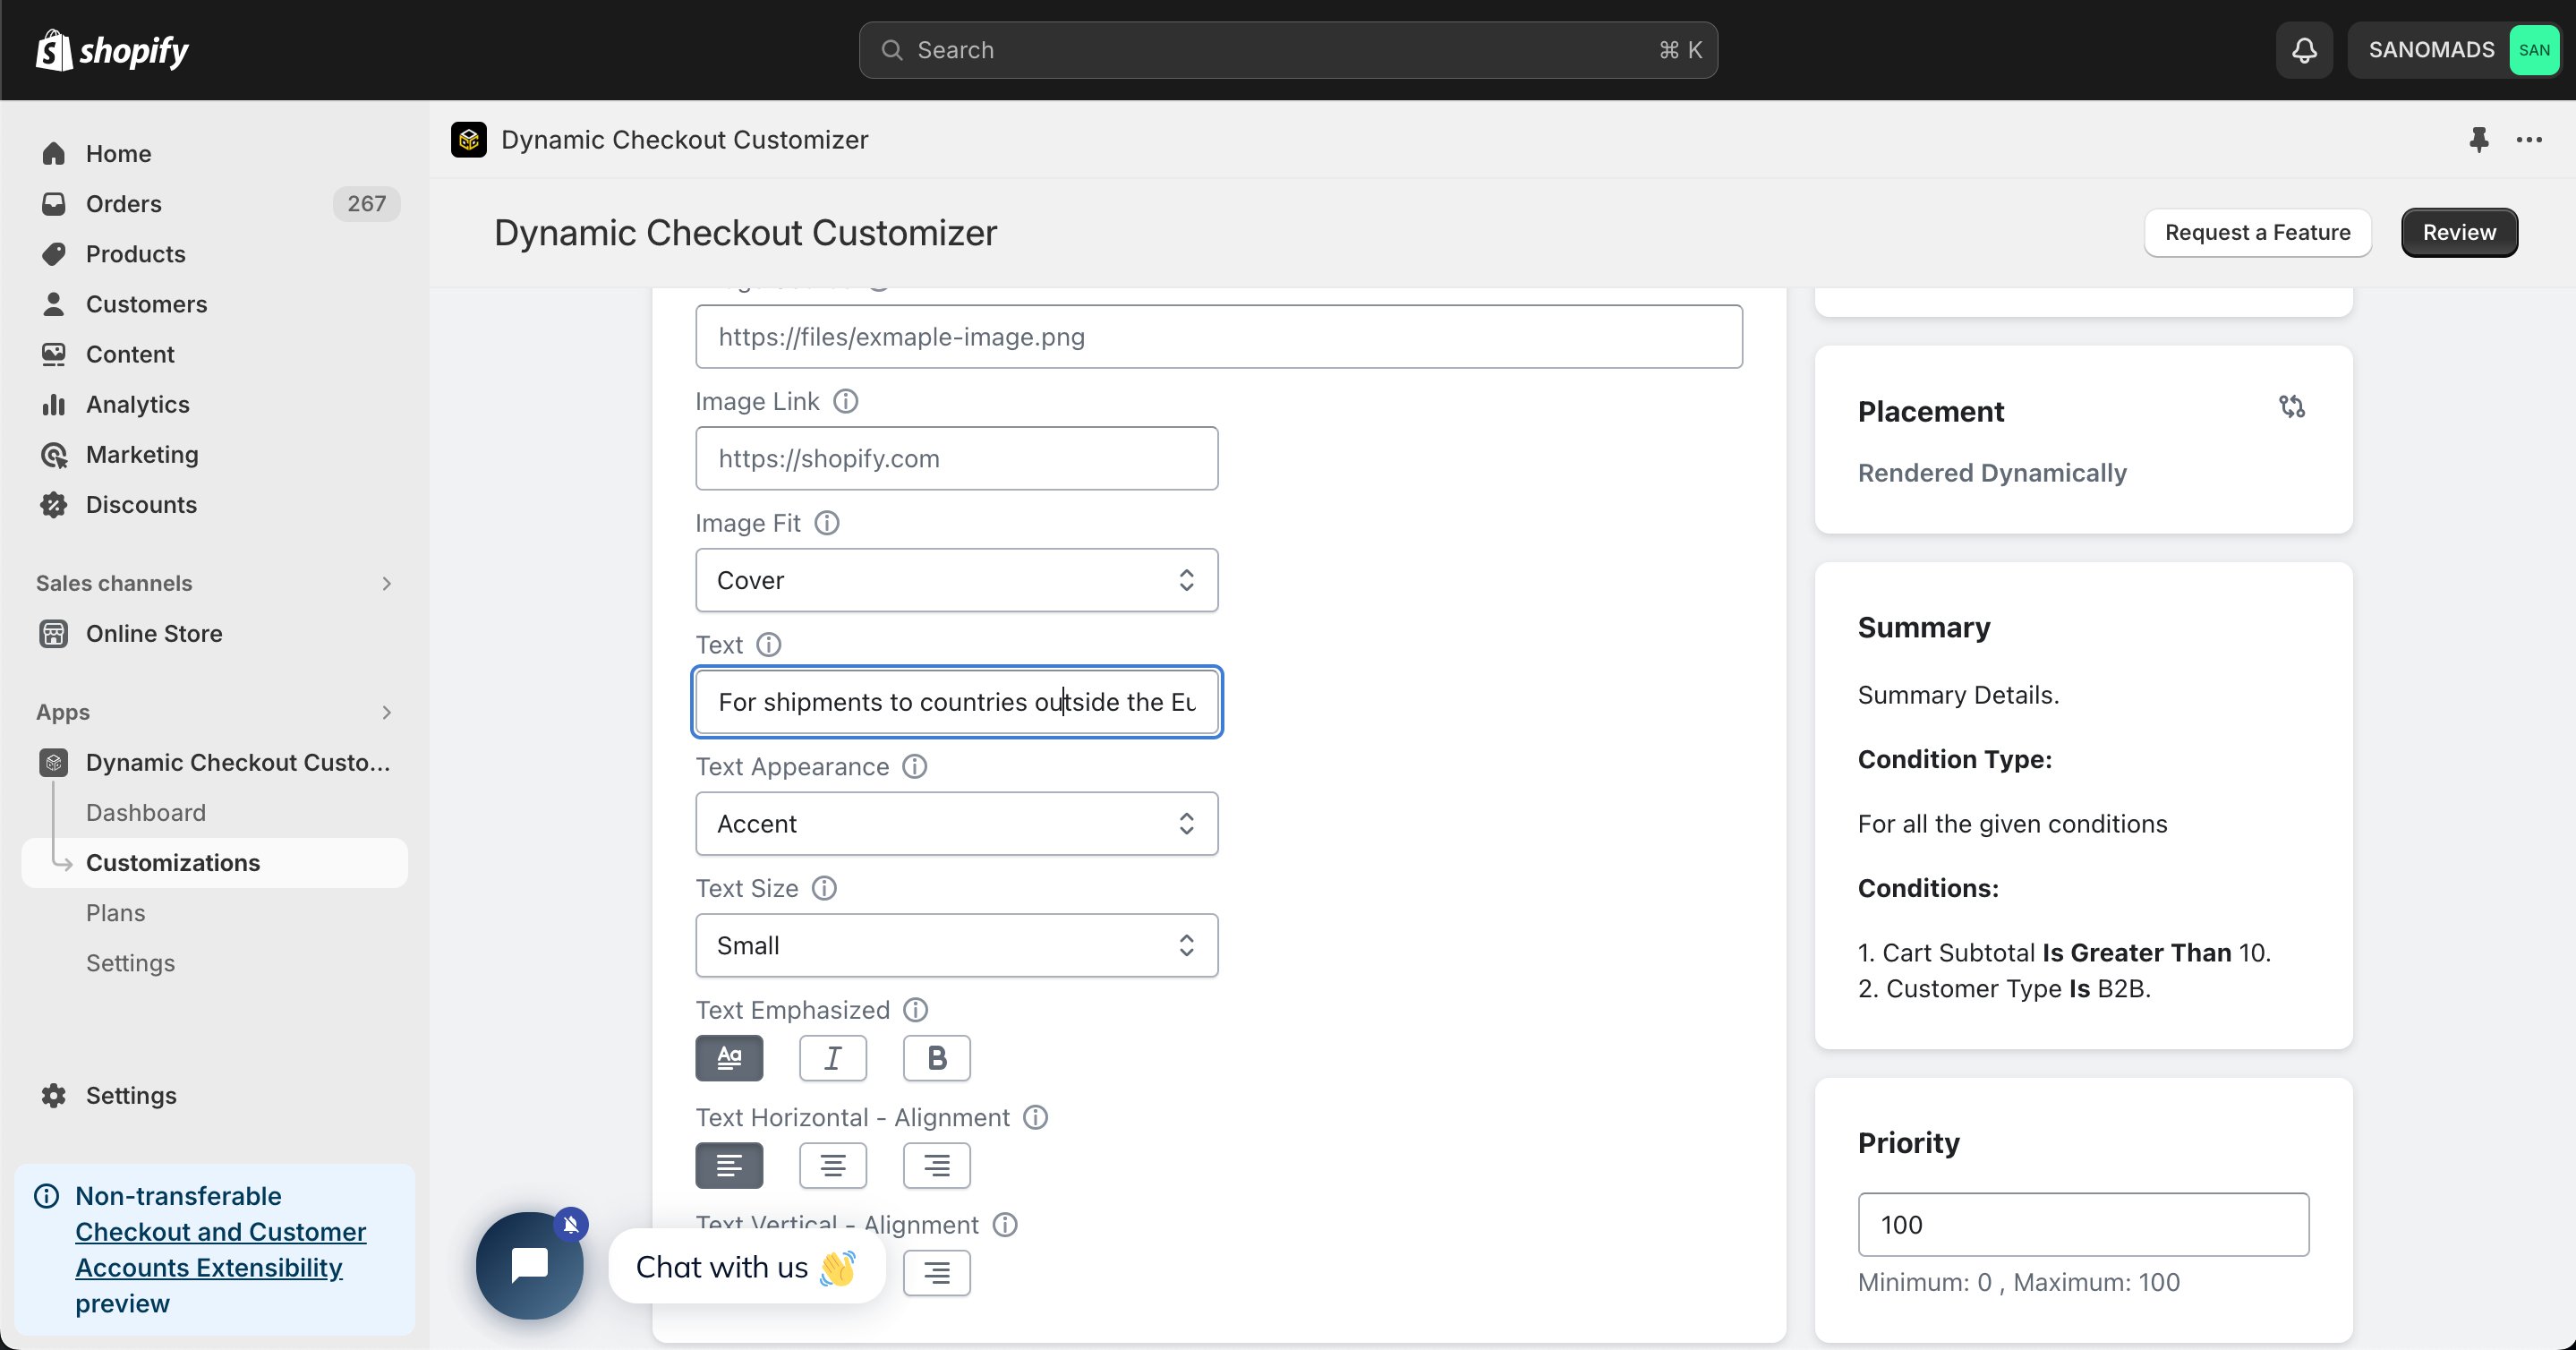
Configure the content
Configure the Content Settings, including:
- Text
- Text Appearance
- Text Size
-
Text Alignment
7
Activate the customization
Change the Status to Active to enable the customization.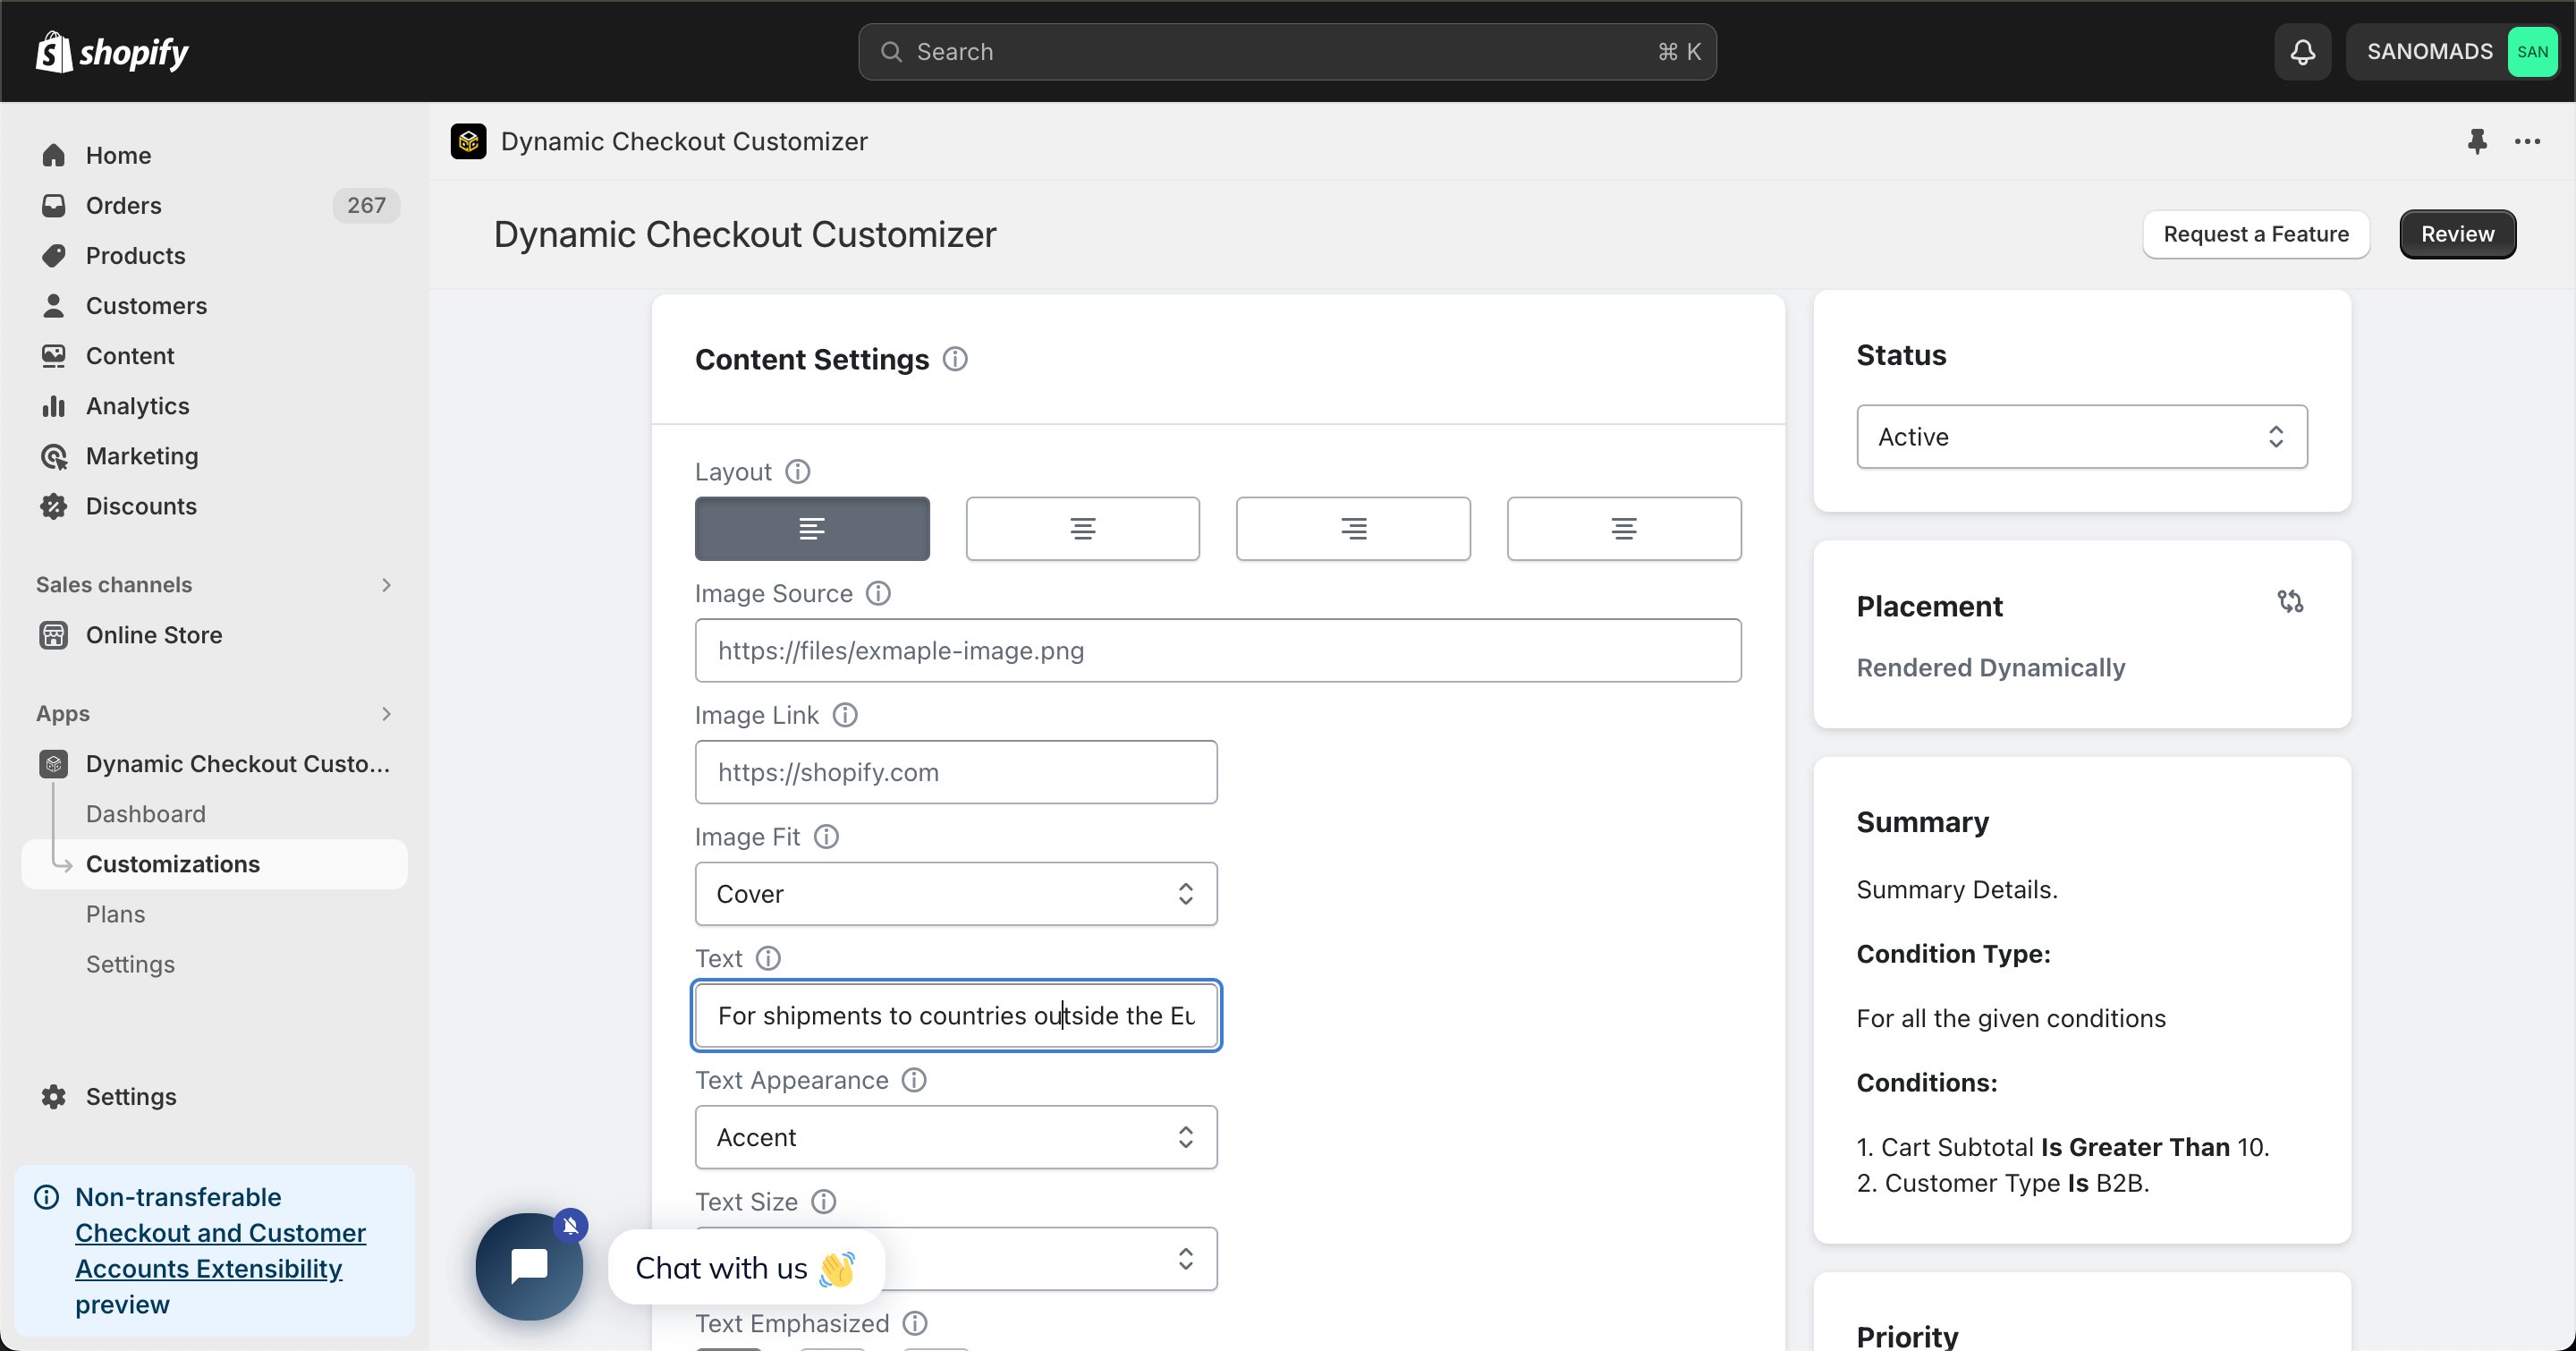
8
Set the priority
Configure the Priority (0–100) to determine the execution order when multiple customizations are eligible.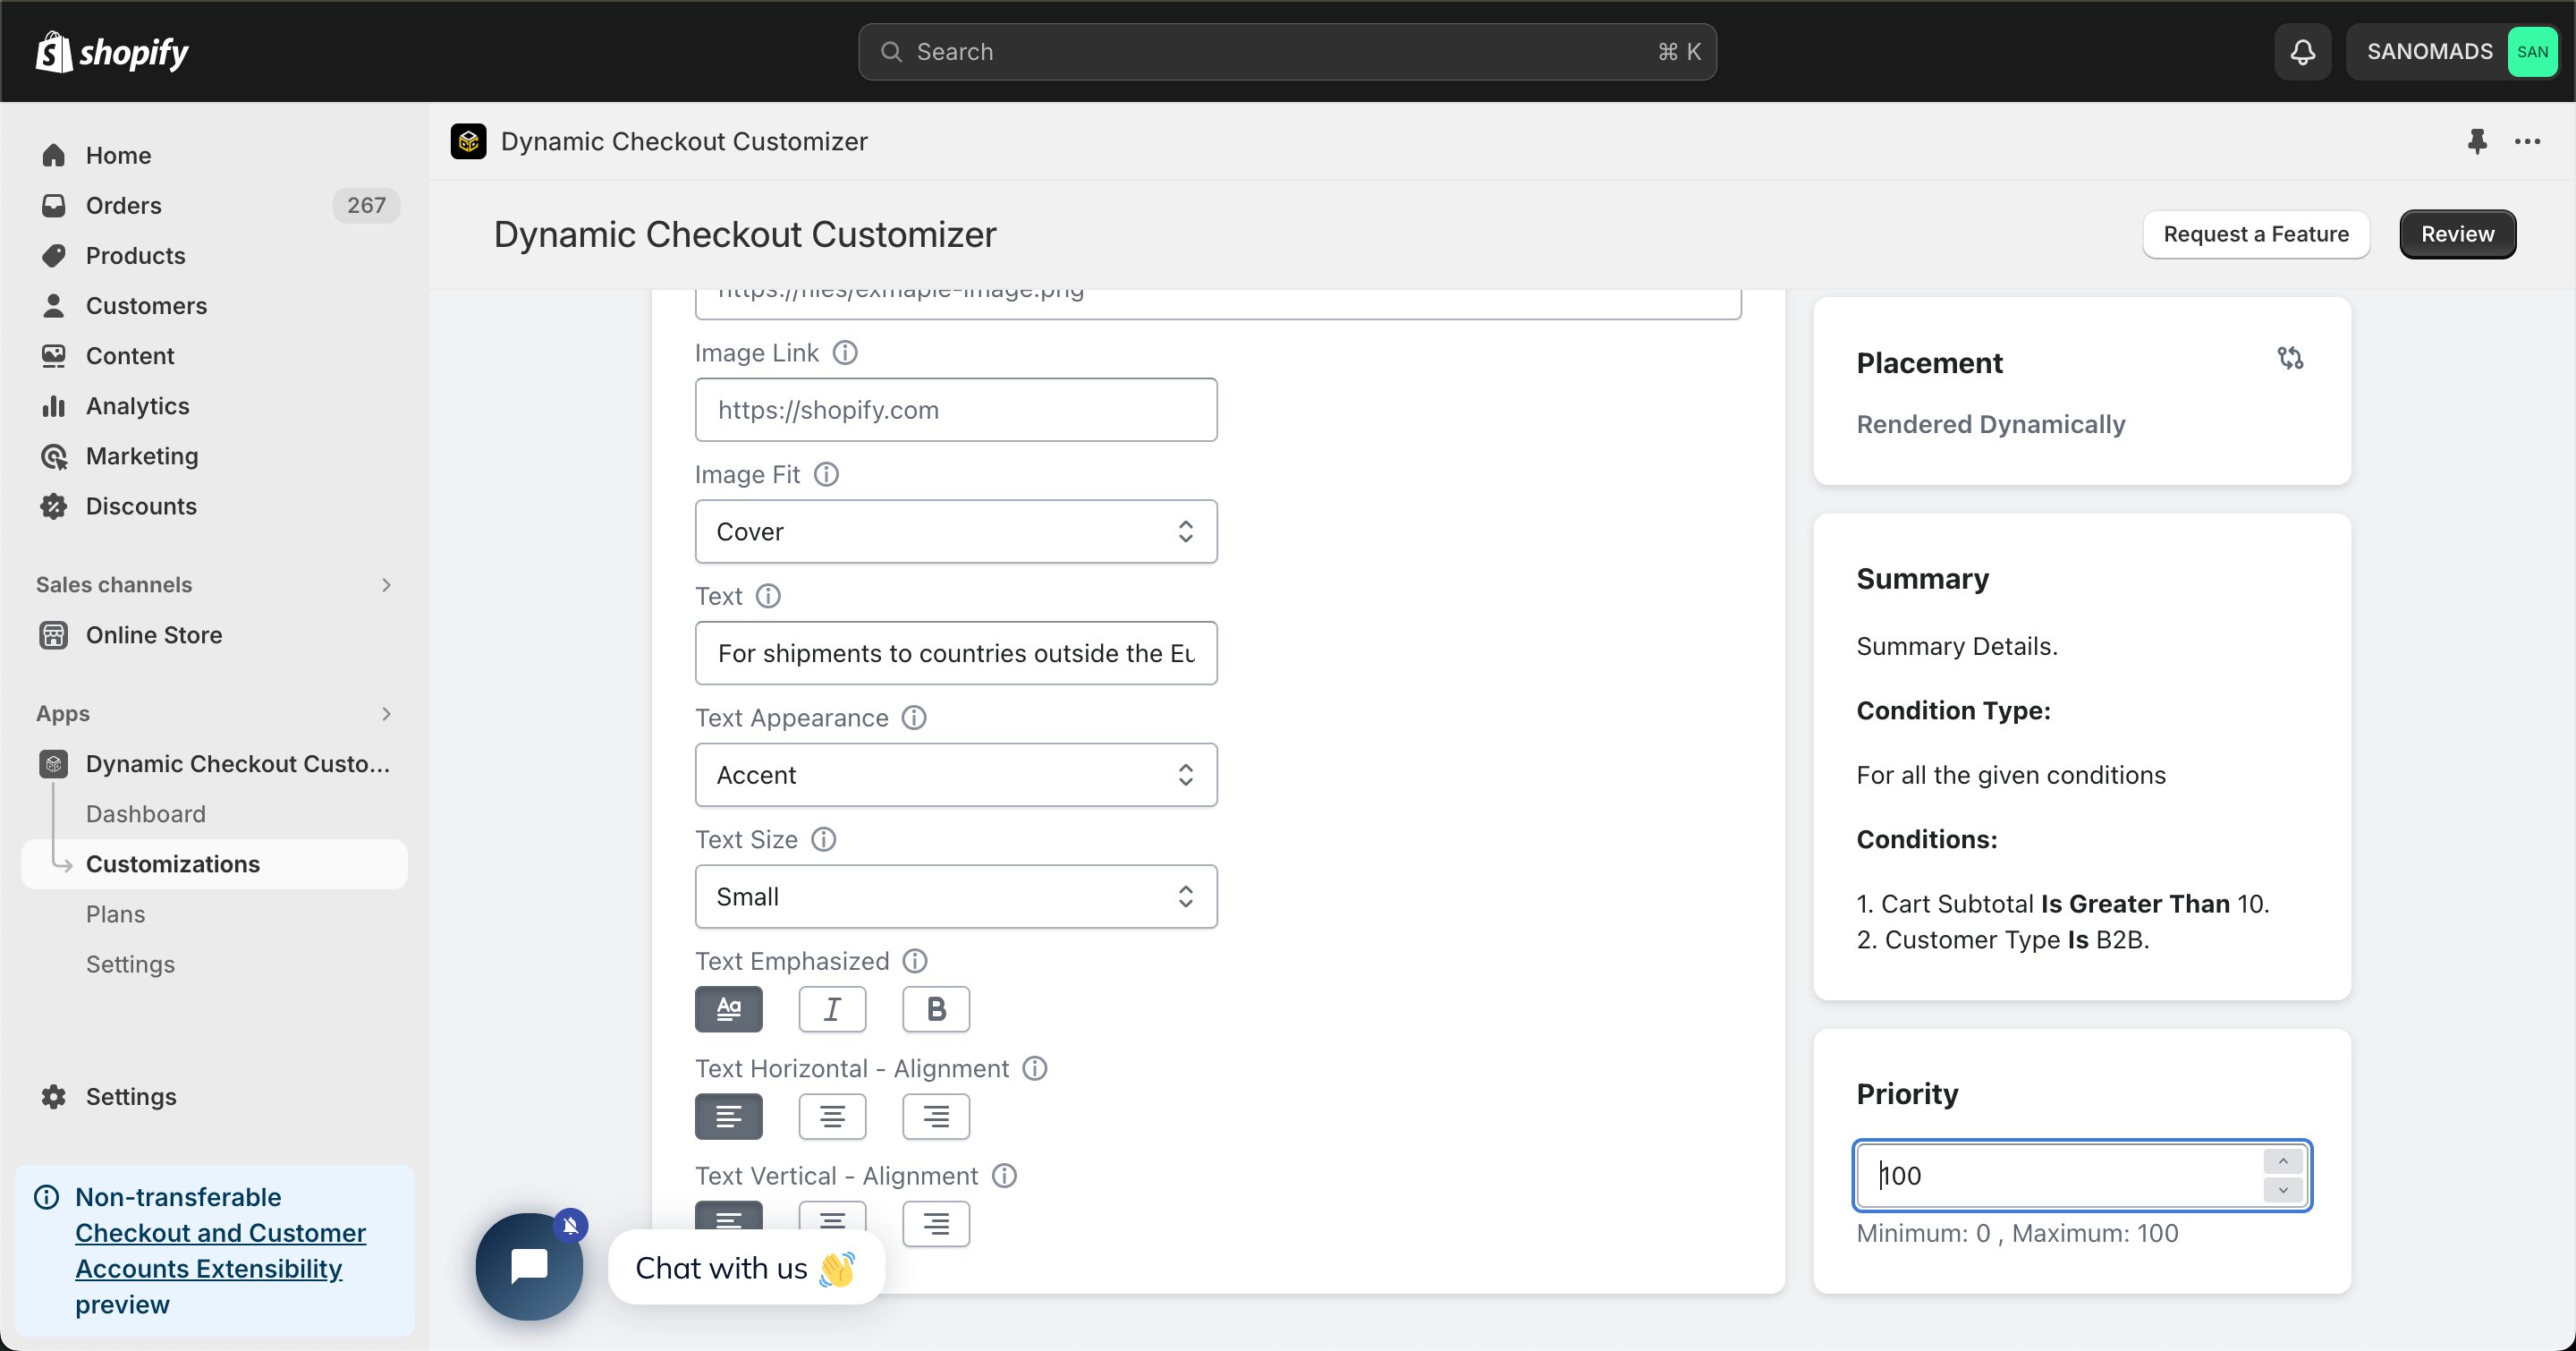
9
Copy the Placement ID
Open the Placement tab and copy the generated Placement ID. You’ll use this in the Shopify Checkout Editor.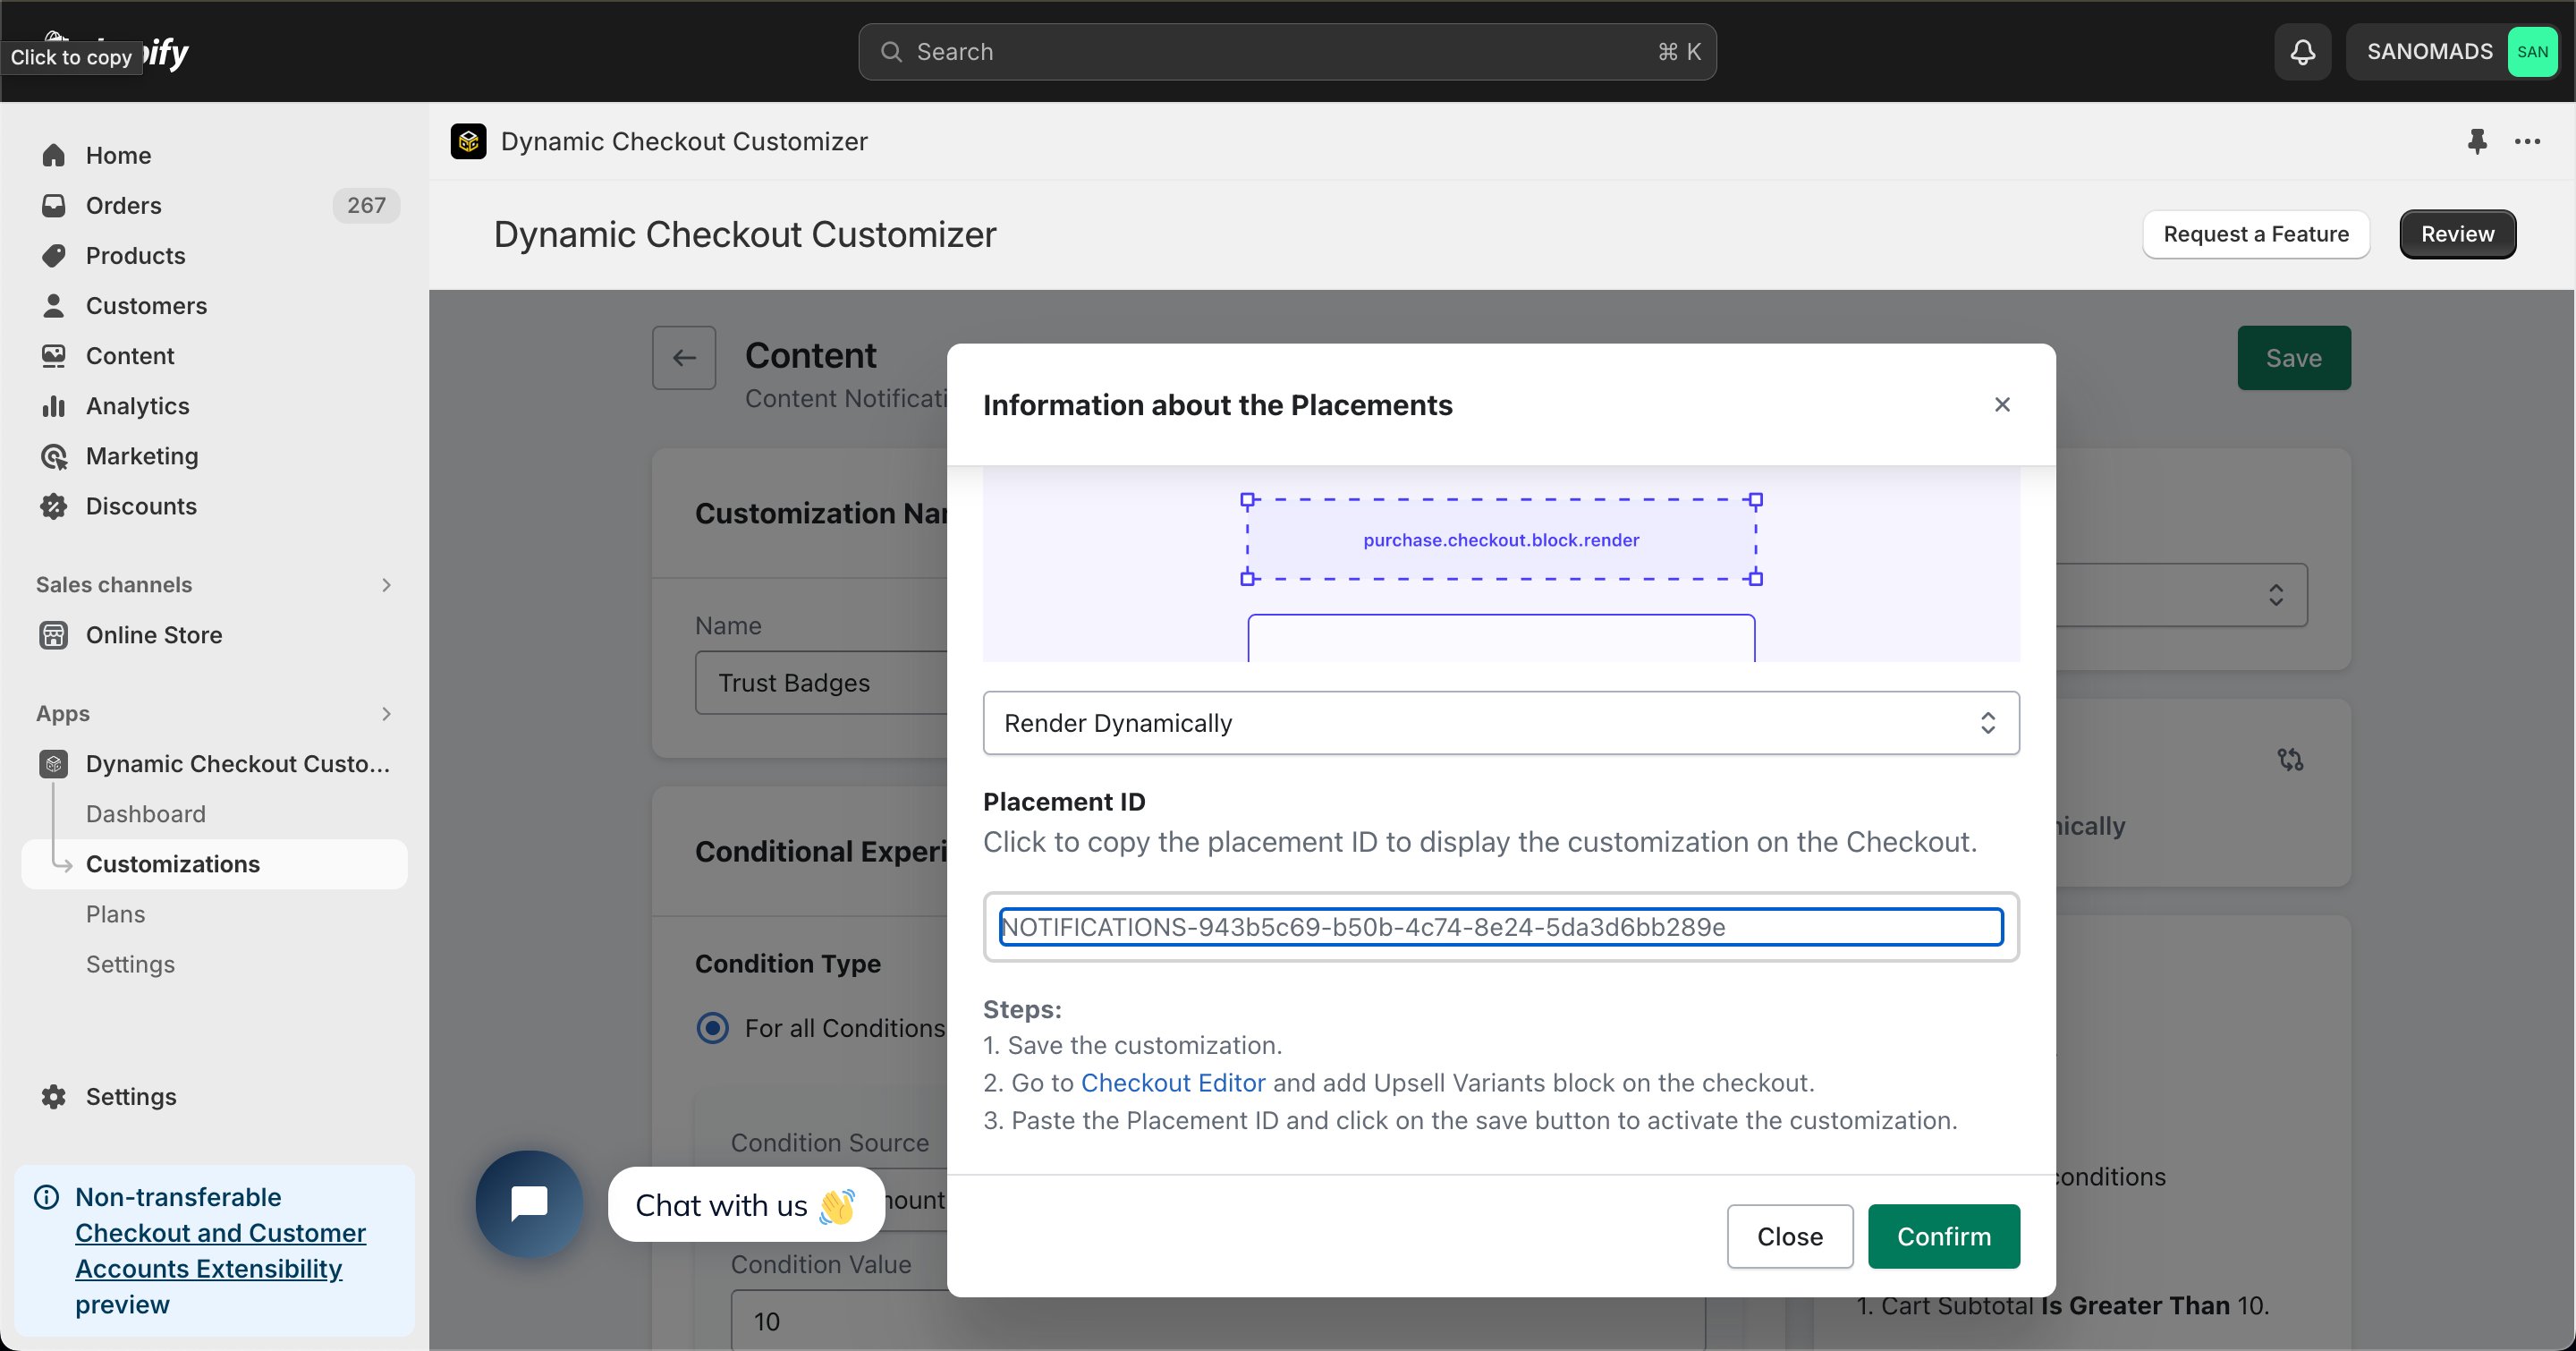
10
Save the customization
Click Save to store your configuration.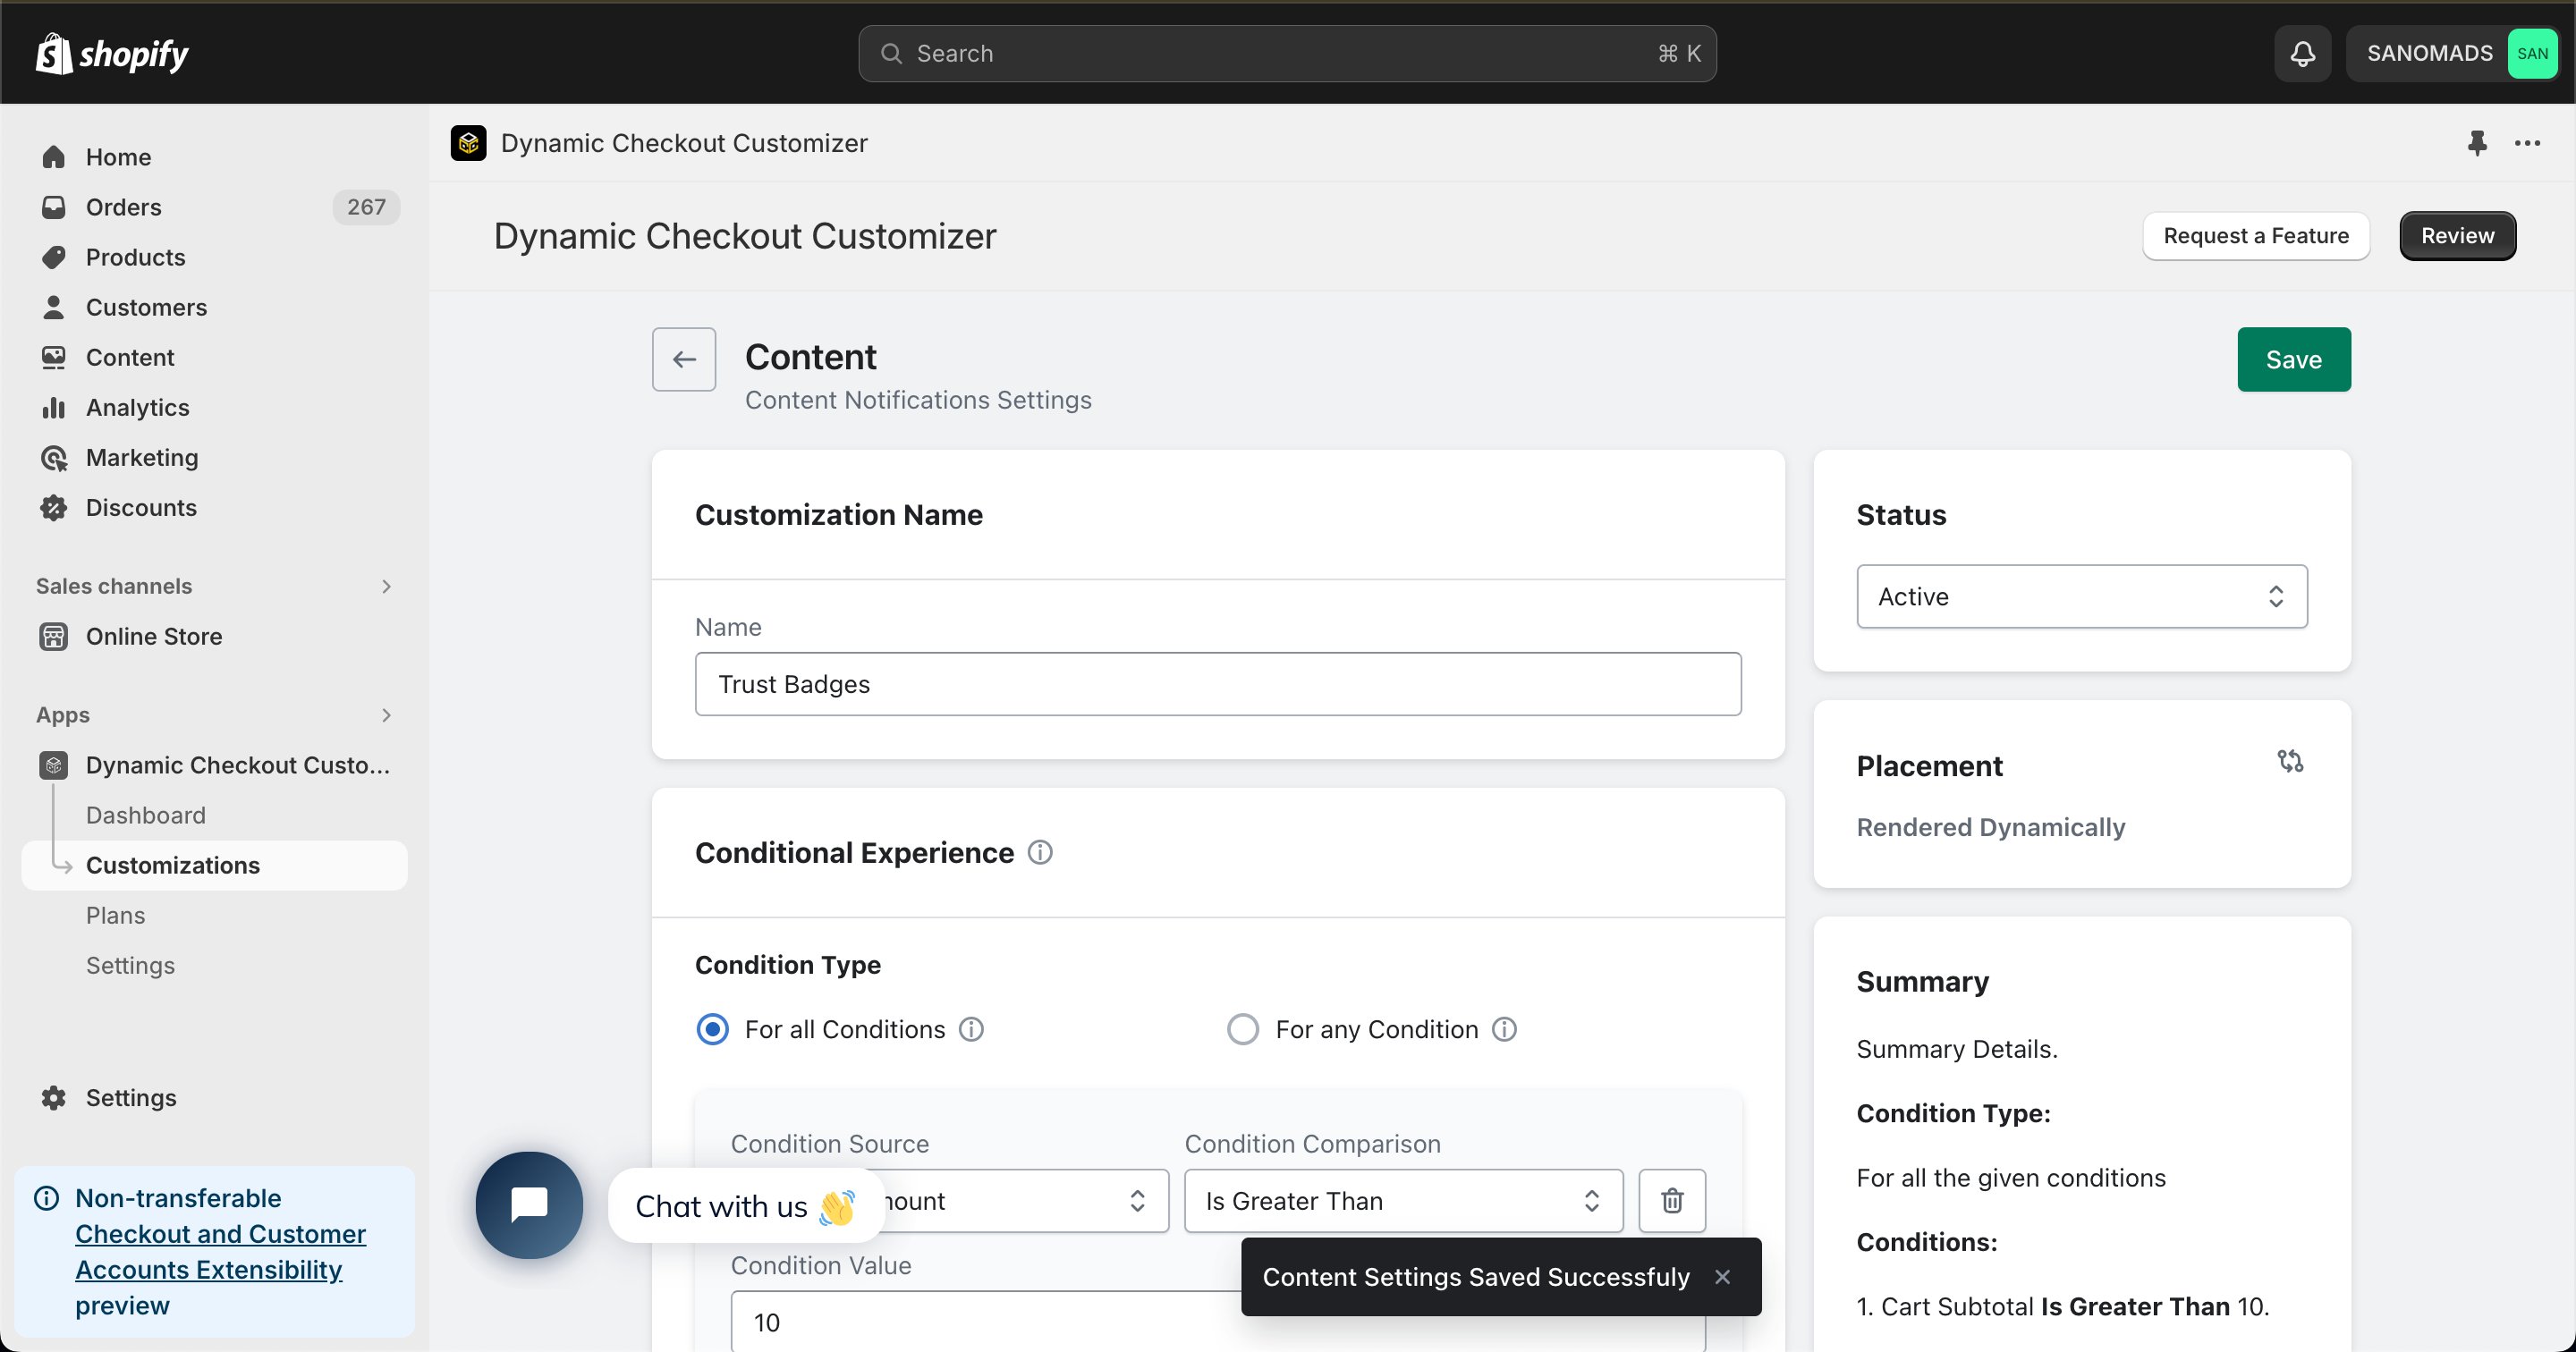
11
Open the Checkout Editor
Go to your Shopify Settings → Checkout, select your checkout profile, and click Customize.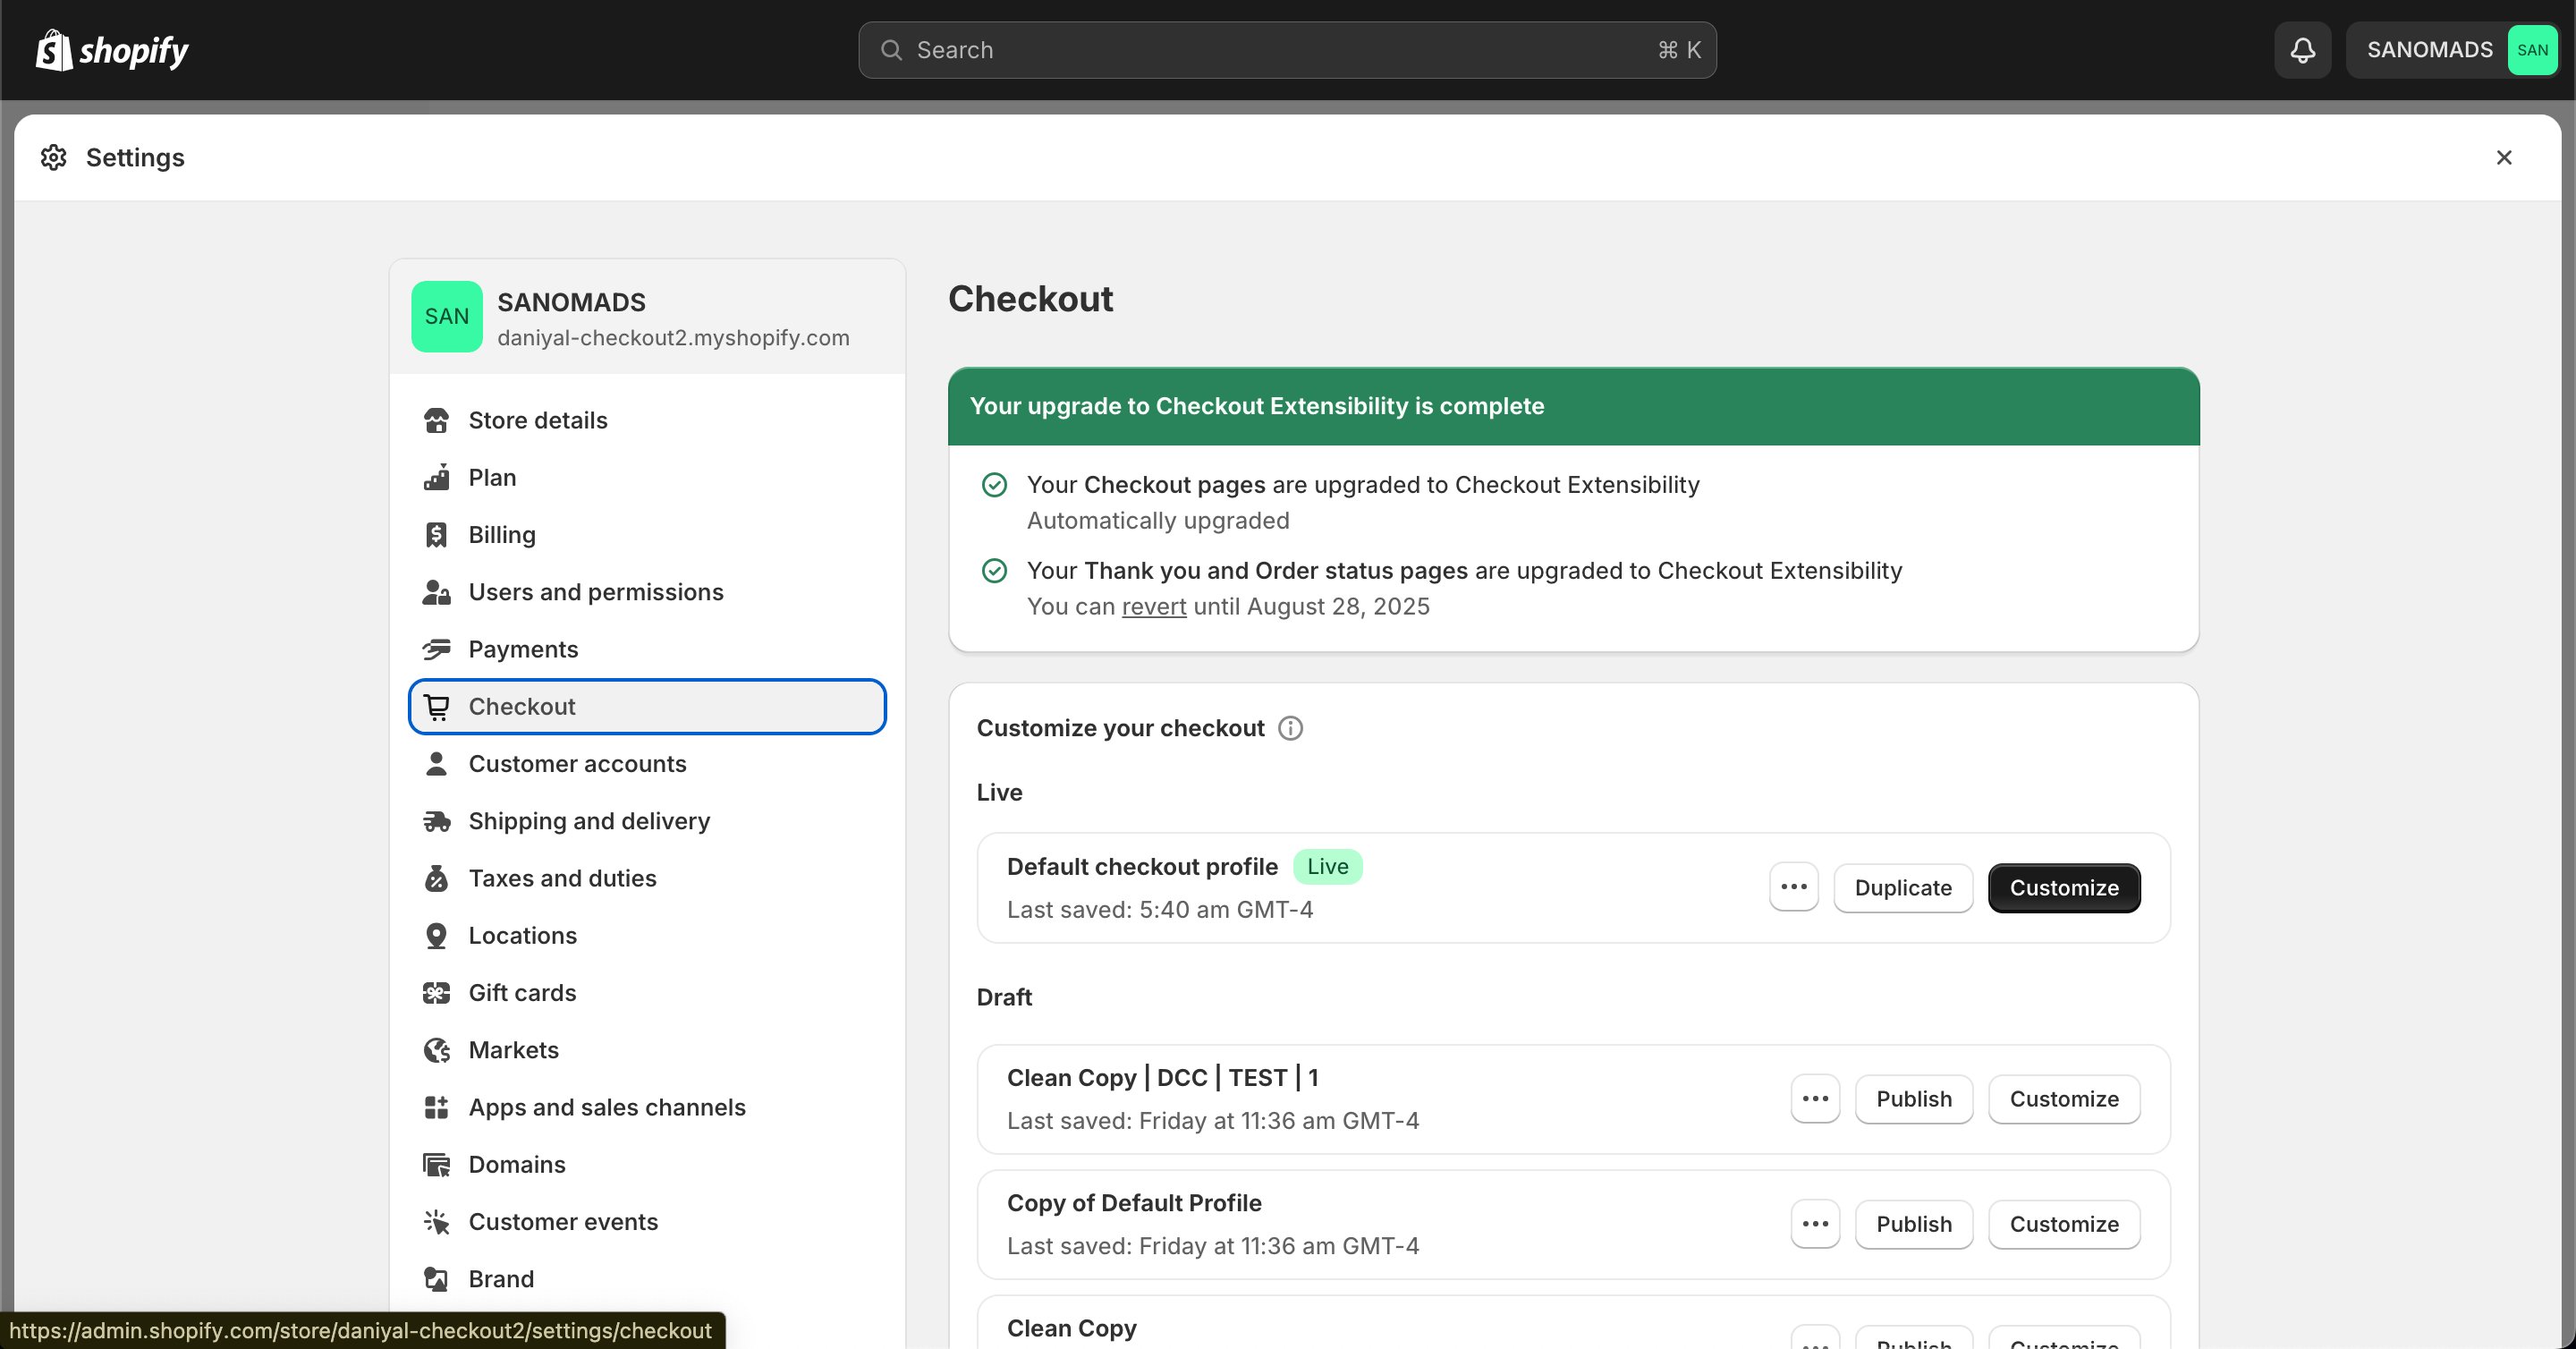
12
Add the app block
In the Checkout Editor, click Add app block.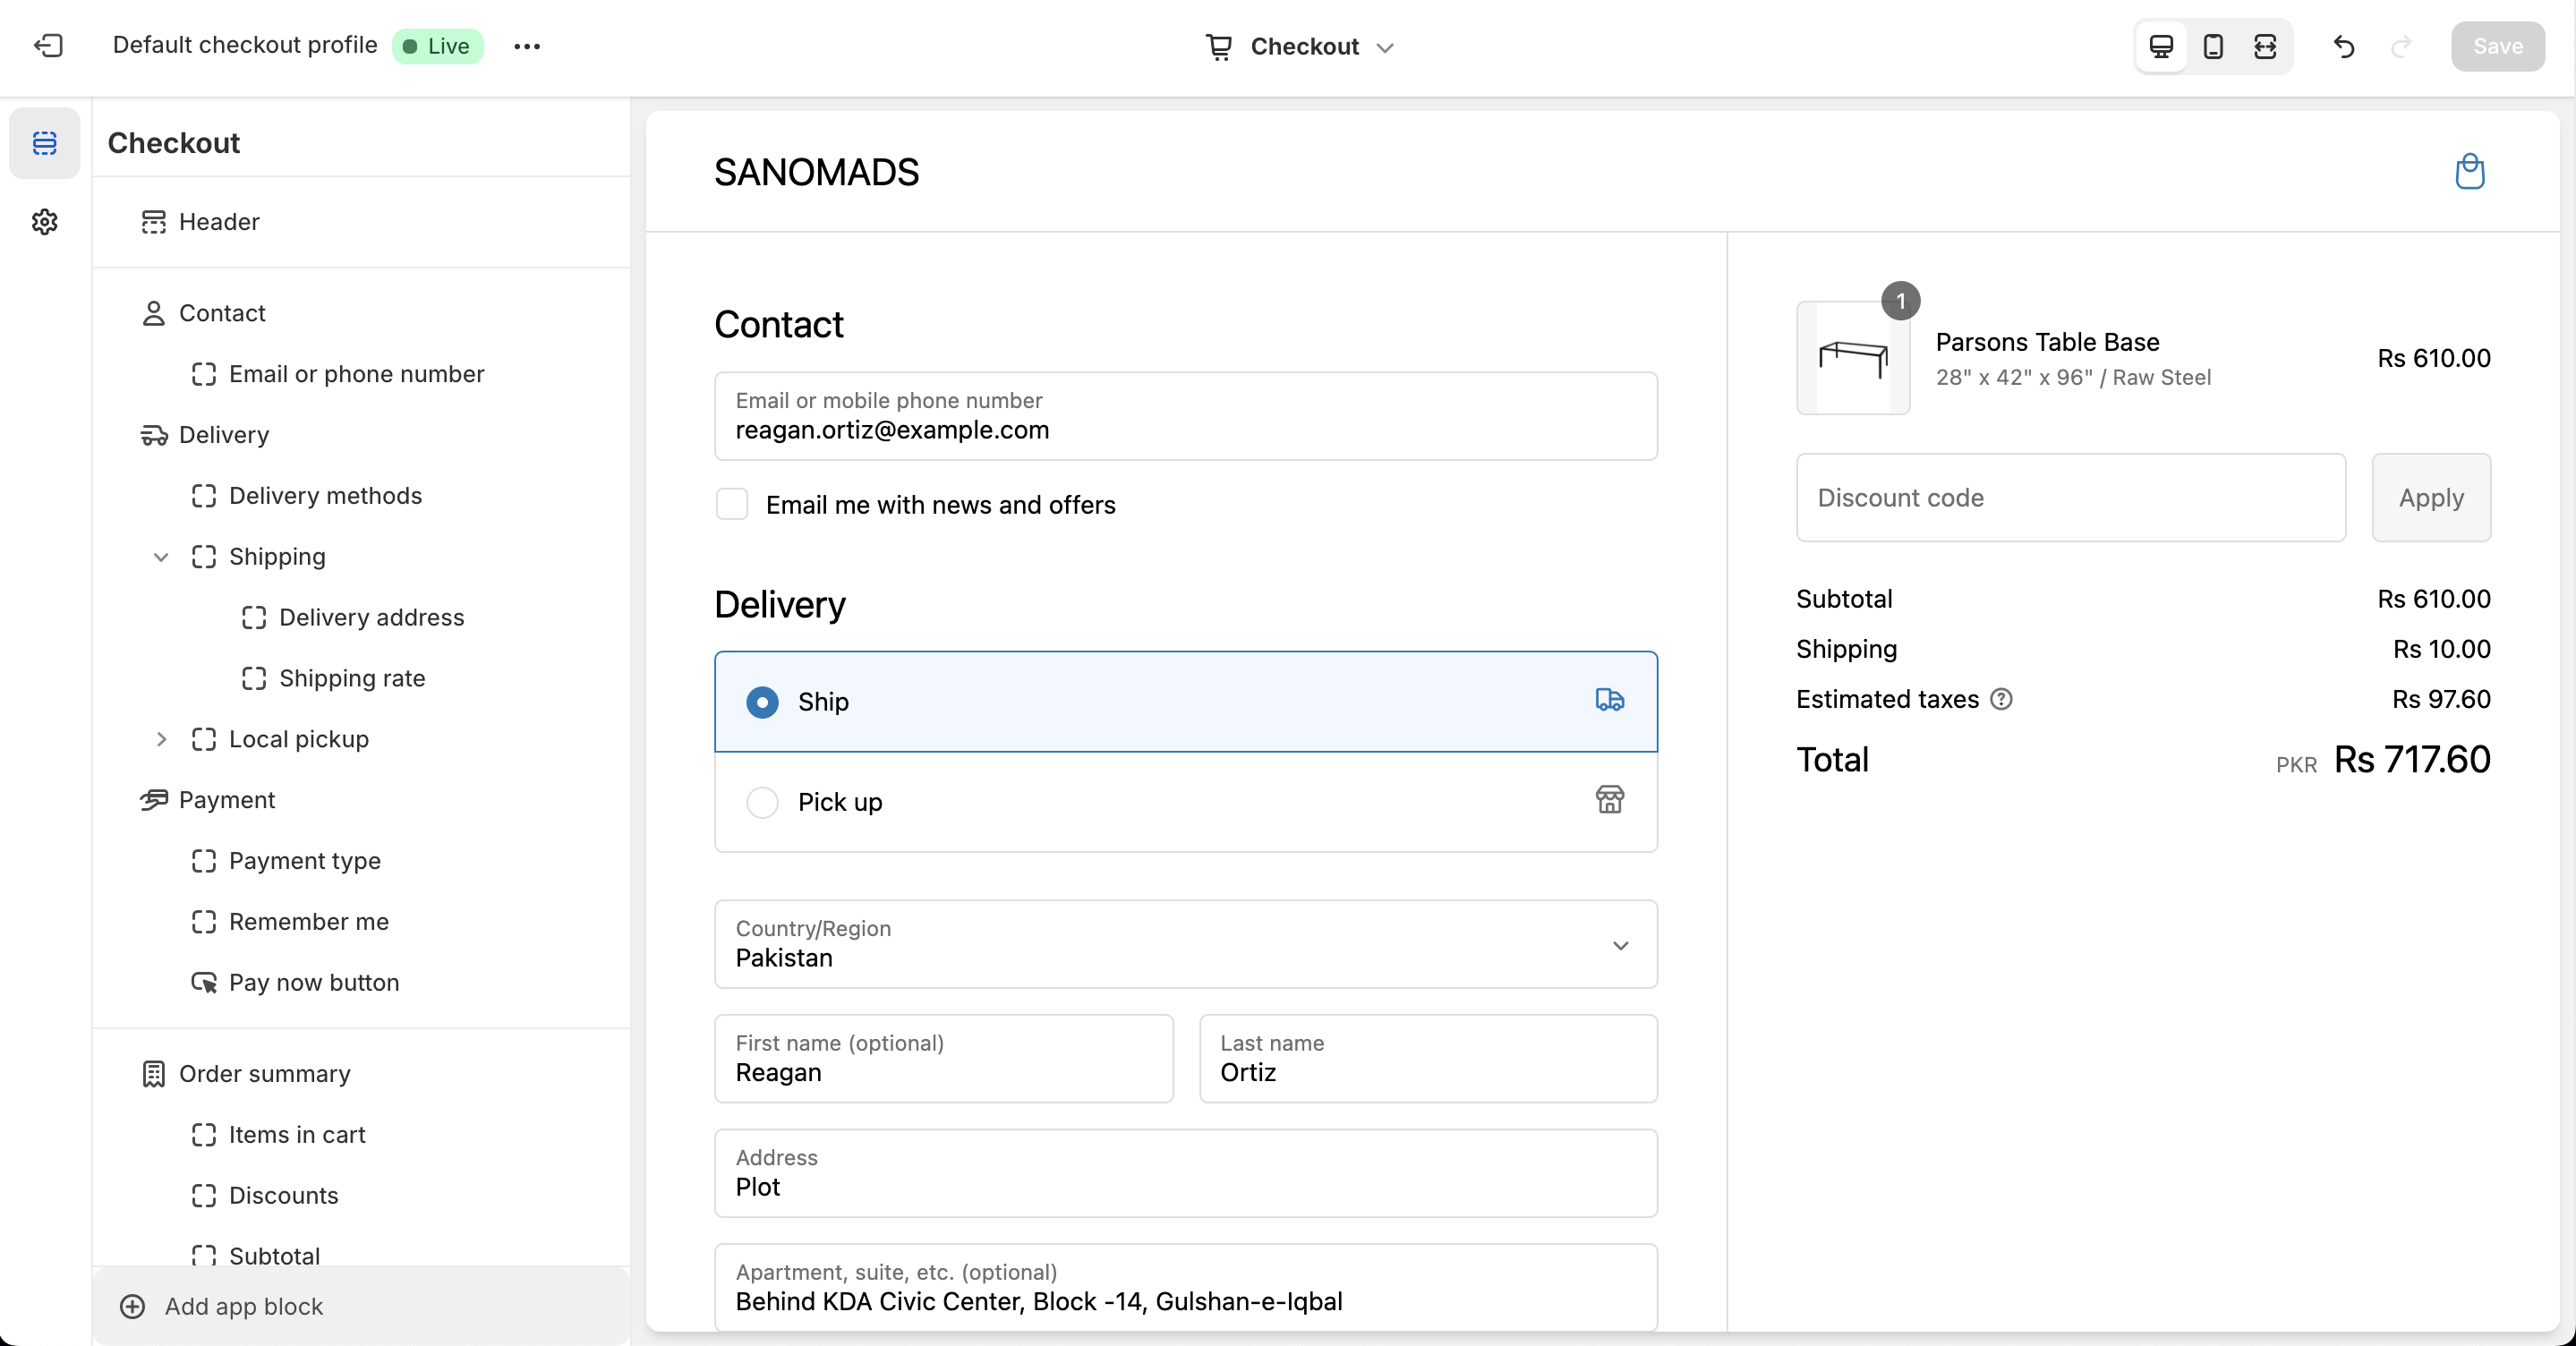
Make sure the app block is placed in the same checkout placement you selected in Dynamic Checkout Customizer.
13
Configure the app block
Select the Checkout – Image Content app block, drag it to the desired location, and paste the copied Placement ID.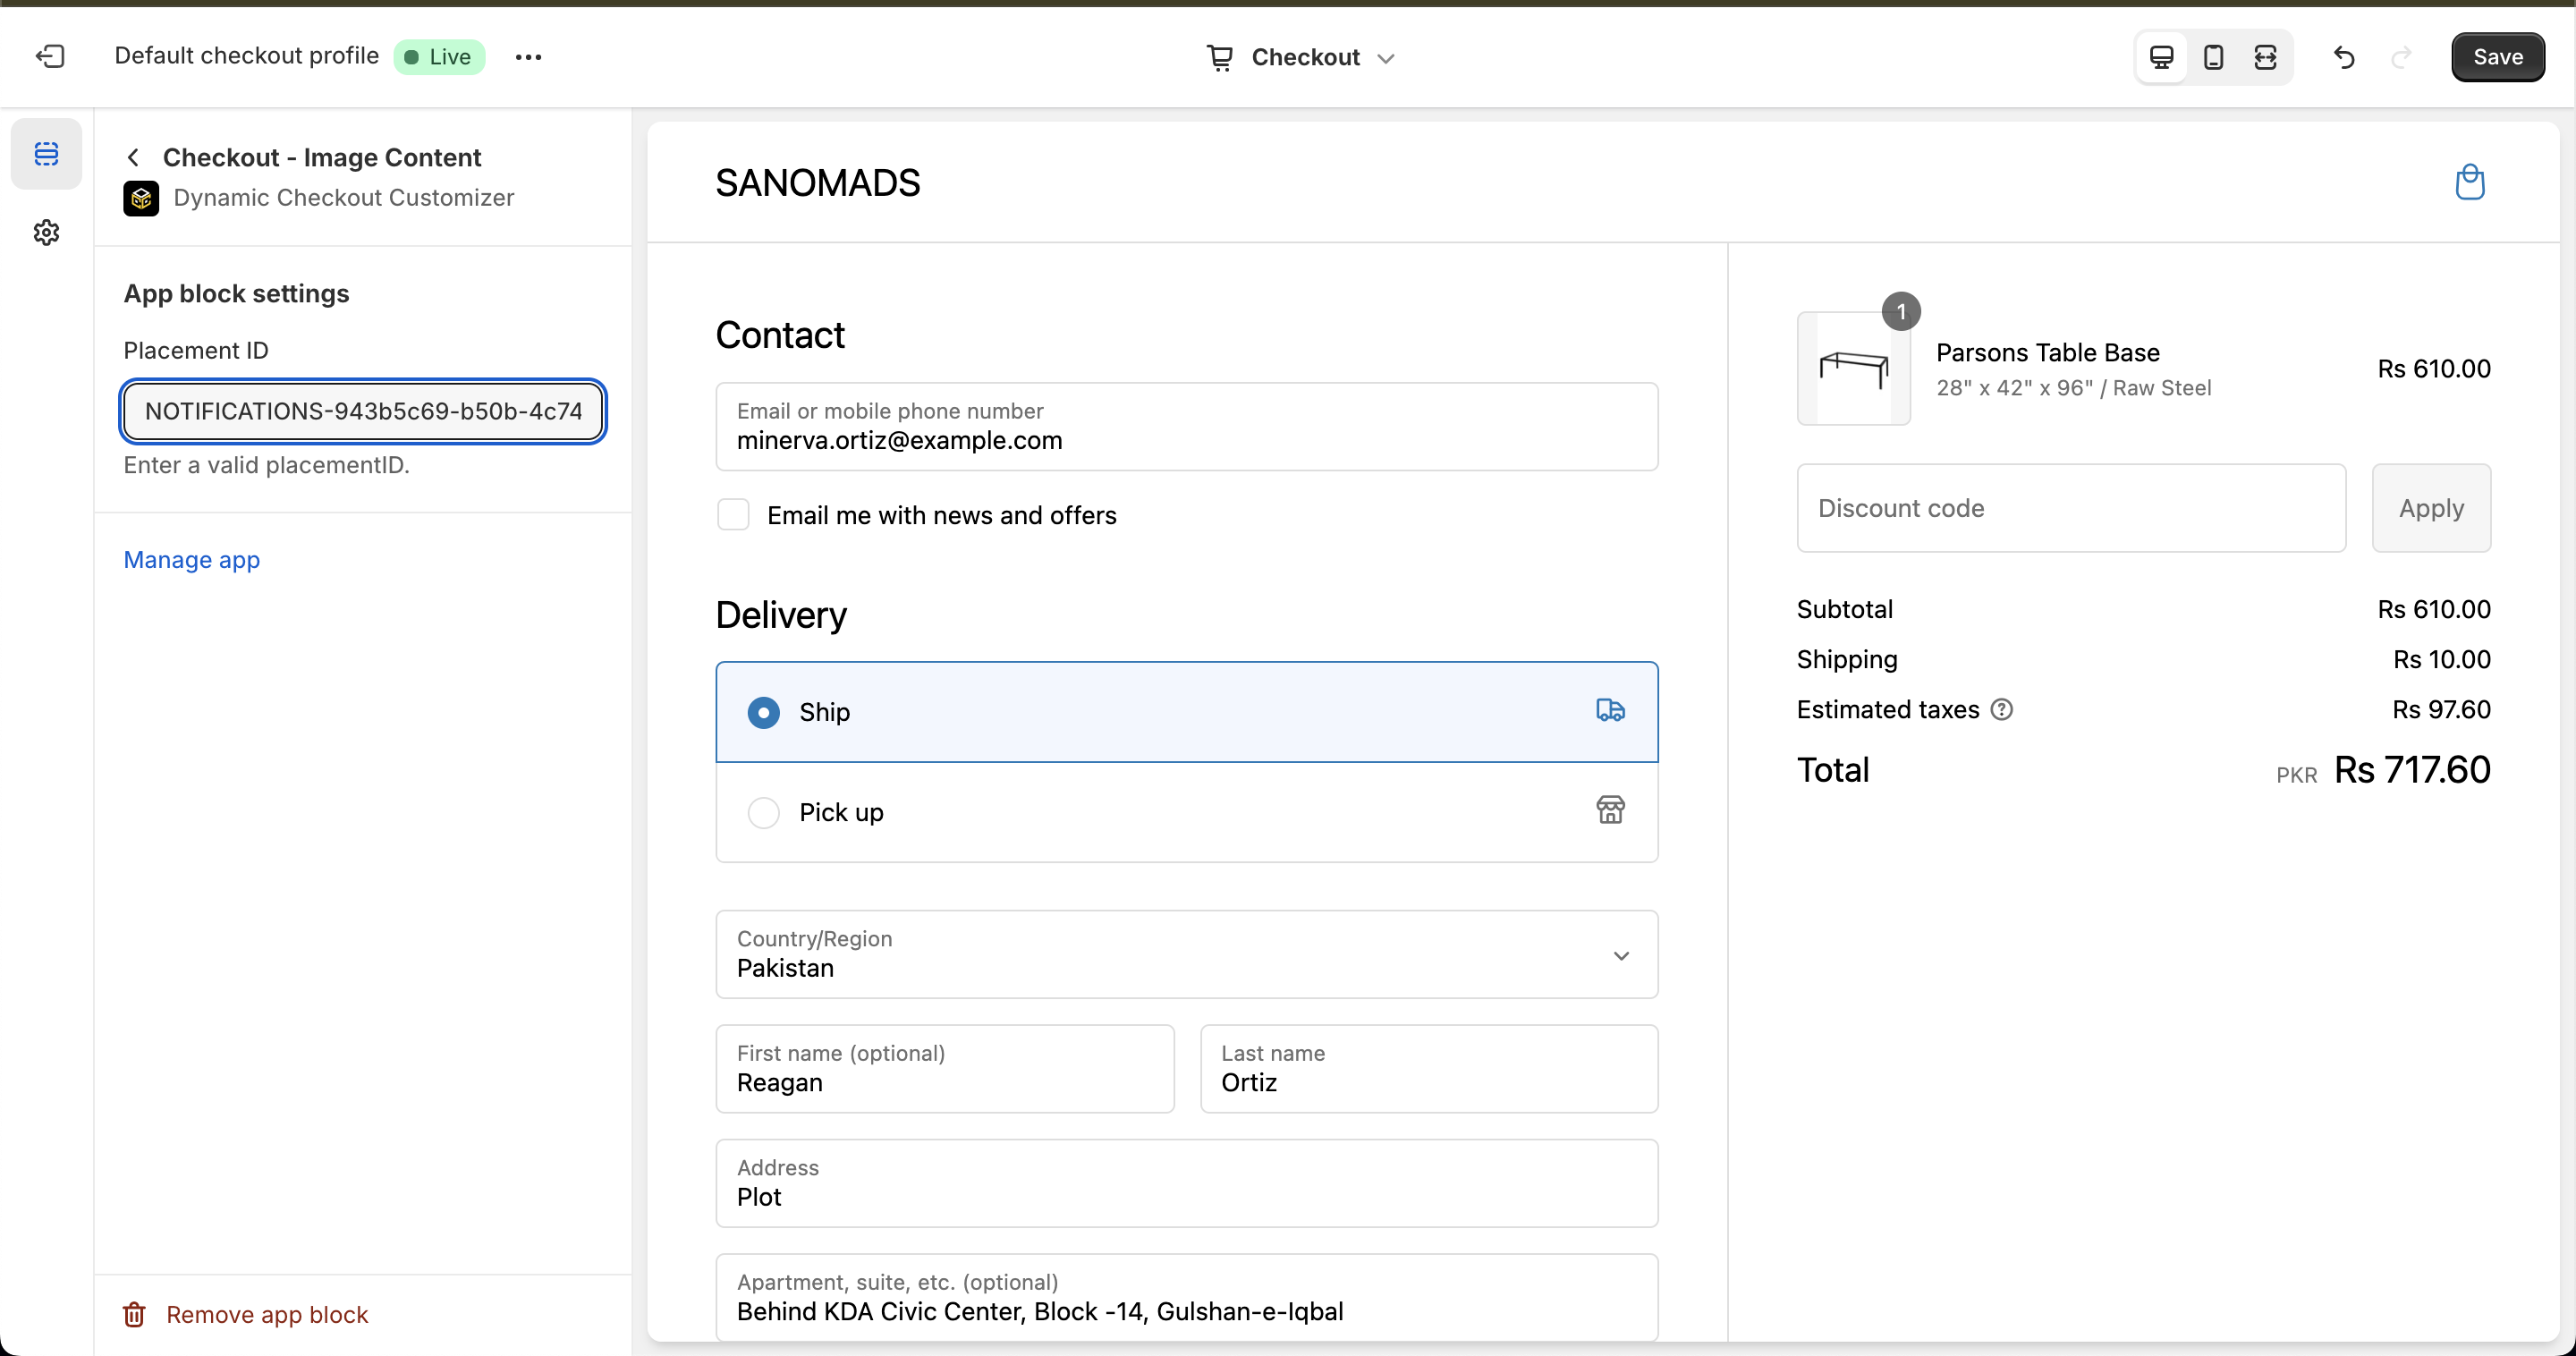
14
Publish your changes
Click Save in the Checkout Editor to publish the customization.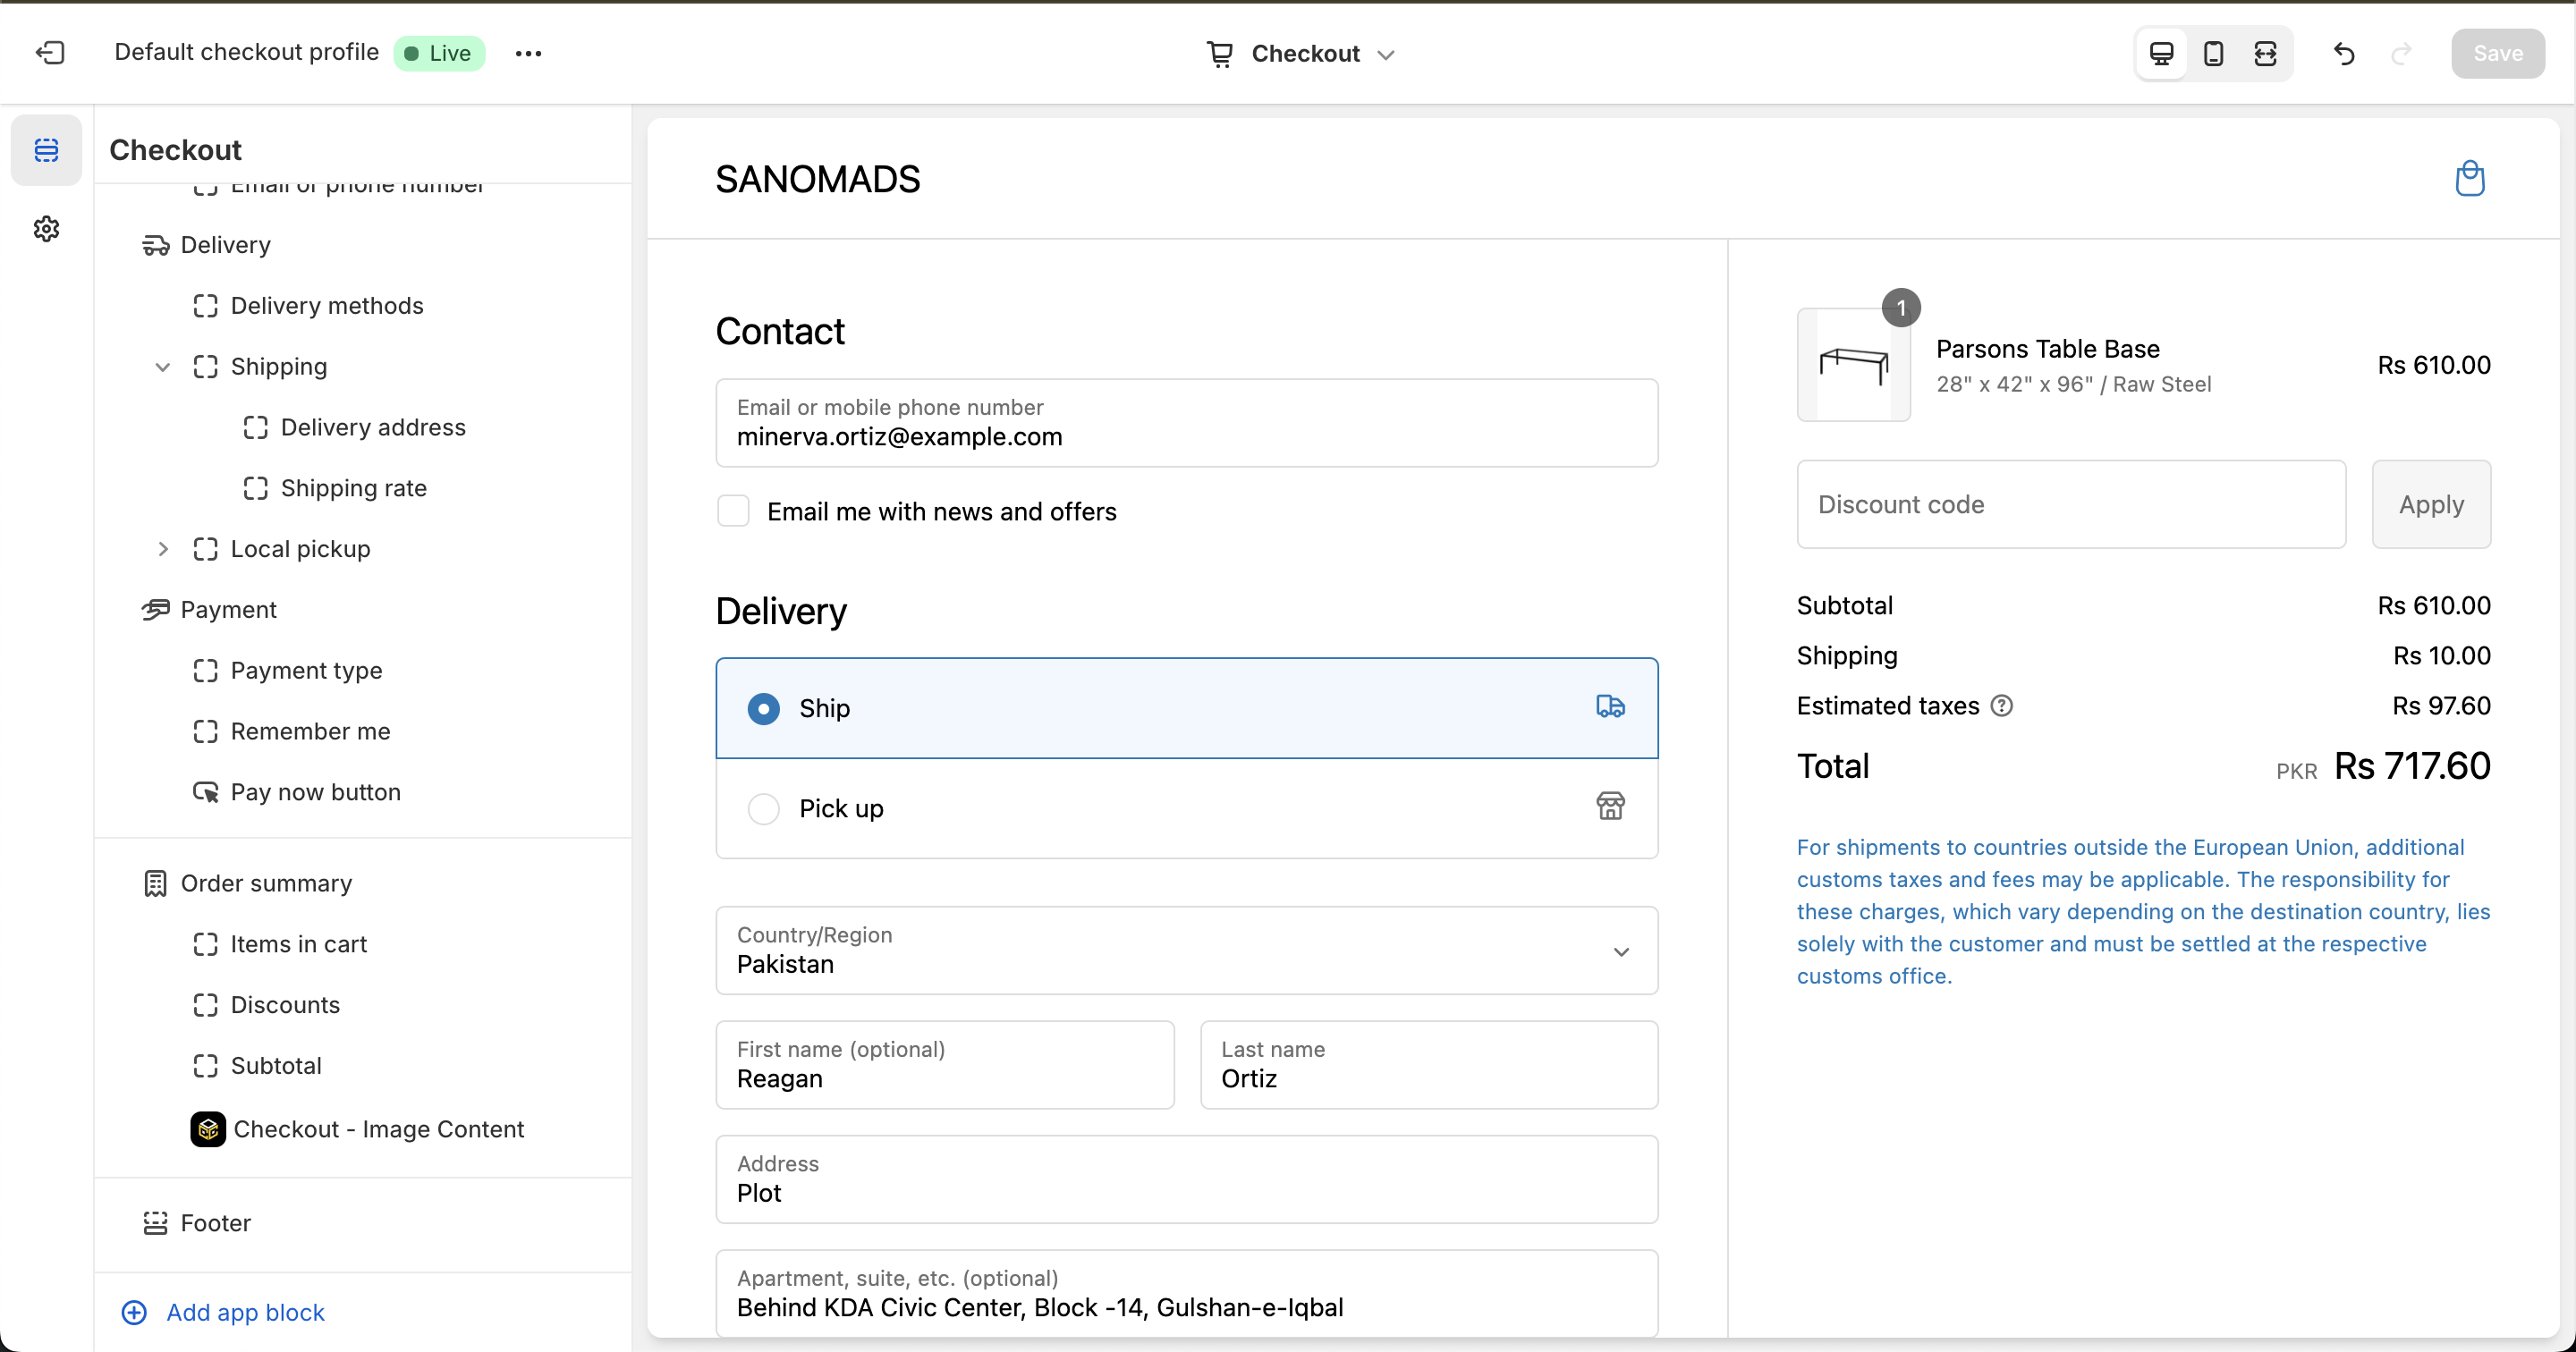
Why does it matter?Gimaguas uses the Notifications → Content customization to display shipping and customs policies during checkout, helping customers make informed purchasing decisions while strengthening trust and brand reputation.